27 Easy DIY Welcome Sign Ideas in 2026
You can put out a welcome mat for company, but you’ll soon find that the image fades and the dirt grinds in. But if you want to be equally inviting but even more practical, you could create one of these fantastic welcome signs from a variety of materials.
Each one is a little different – or very different – from each other and offers a unique peek not only into your style but into your personal hospitality approach. So, grab some wood, some paint, or any of the other supplies and make something distinctly your own.
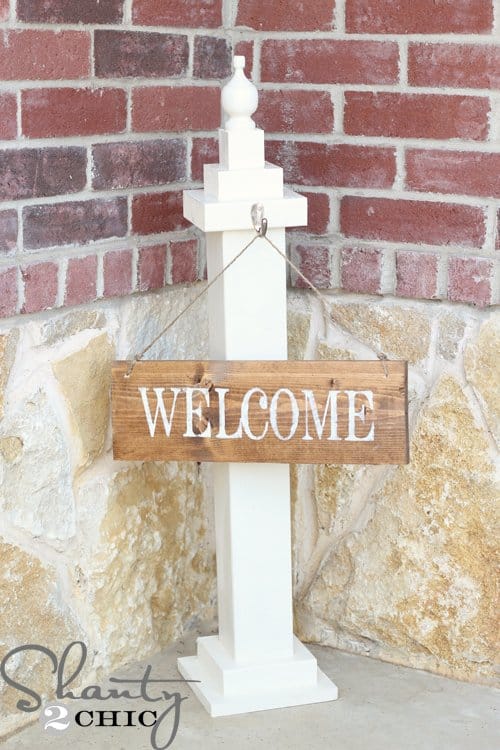
Simple Porch Welcome Post
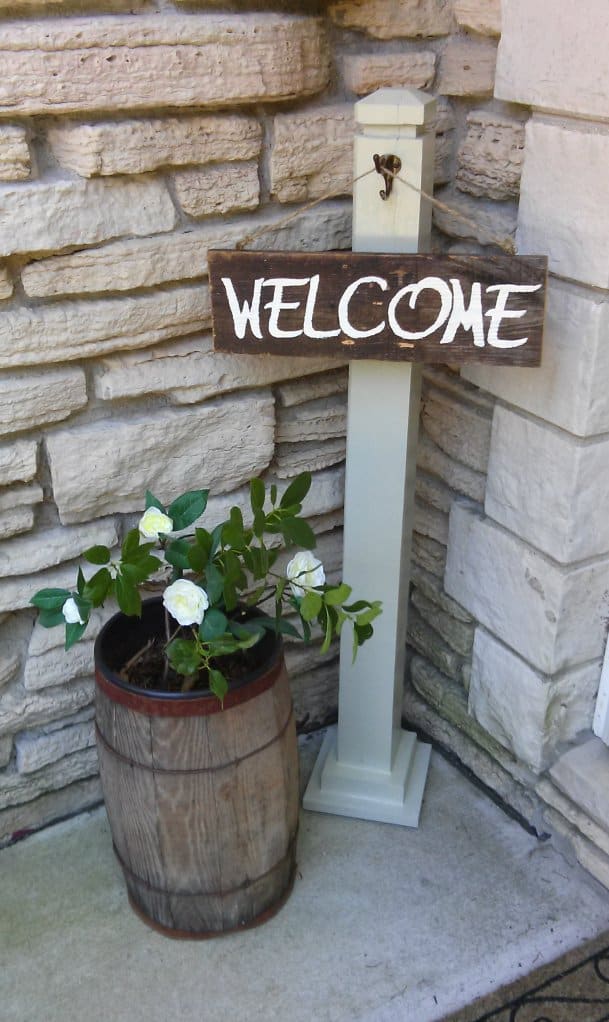
This is a super practical and uber attractive, welcoming post sign that just about anyone can make. You’ll need a simple 4 x 4 post, a bit of wood and string, and a little paint. In no time, you’ll have a high-end, inviting sign that will help your visitors feel welcomed.
But the best part is that the sign is removable, so you can tweak the design and make a few different options to hang on different occasions.
Painted Silhouette Welcome Sign
For an extremely simple but very attractive welcome sign, you should check out this tutorial. It takes just a piece of wood, a silhouette (or stencils), and some paint. The result is a big, beautiful sign that can be reversed to include any message you want.
You can buy some large wood letters if you don’t have a silhouette or you can find some DecoArt 3-inch letter stencils at your favorite craft store.
Super Easy Welcome Sign with Flowerpot
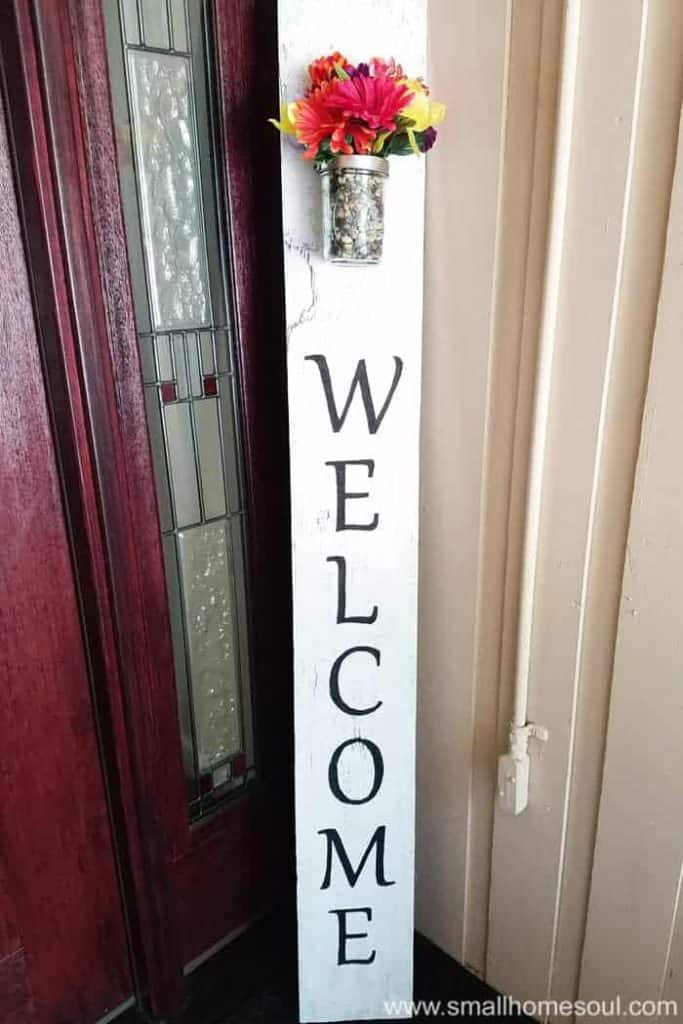
We love this welcome sign because it’s not just a sign, but a sign and flowerpot. For anyone who loves gardening and pretty things, this is a super simple project that really adds to your porch with a personal touch.
The tutorial shows you how to make the sign and attach the flowerpot easily. You’ll just need some craft paint, black acrylic paint, white chalky paint – or exterior paint – a 5-foot board, a Mason jar, carbon transfer paper, and a few hardware supplies, plus the pretty flowers.
Via Girl Just DIY
Huge Front Porch Welcome Sign
If you’re looking for a sign that the neighbors down the road can read, then this one is for you. In fact, it’s big enough that it’s great for not just porches, but the ends of long driveways, highly decorative yards, and wide entryways.
You’ll need some giant wood letters, exterior paint, a giant wood board, a hot glue gun, and some glue sticks. With the simple tutorial, you’ll have the sign ready for use in no time.
Chalkboard Signpost

For another signpost welcome that’s even more versatile, you’ve come to the right tutorial. This chalkboard signpost welcome sign is adorable, adjustable, and simple to make.
You’ll need some specific supplies to make it, but it’s easy. Grab a post hook, glass knob, chalkboard paint, wood post skirt, and some tools – including a brad nailer, which you may need to rent from Home Depot – and voila. You’ll have this classy signpost that everyone thinks you bought at an upscale department store.
Via Home Depot
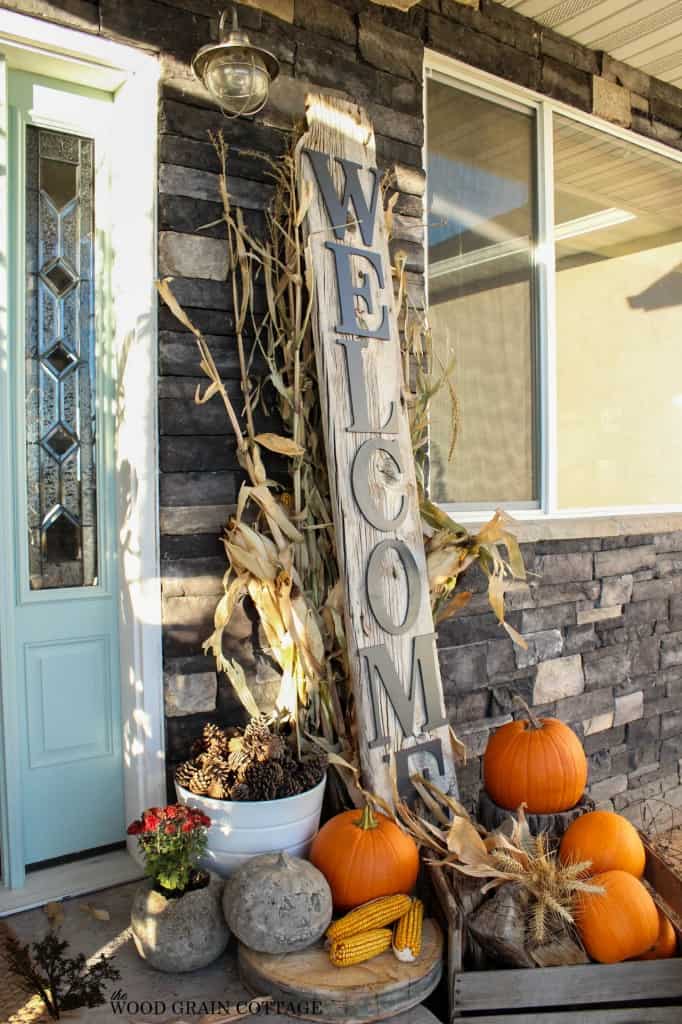
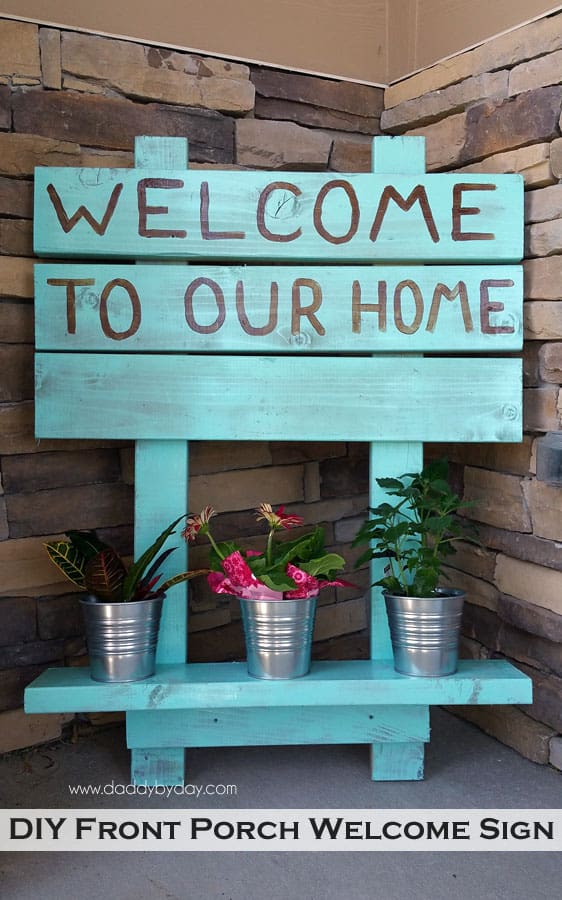
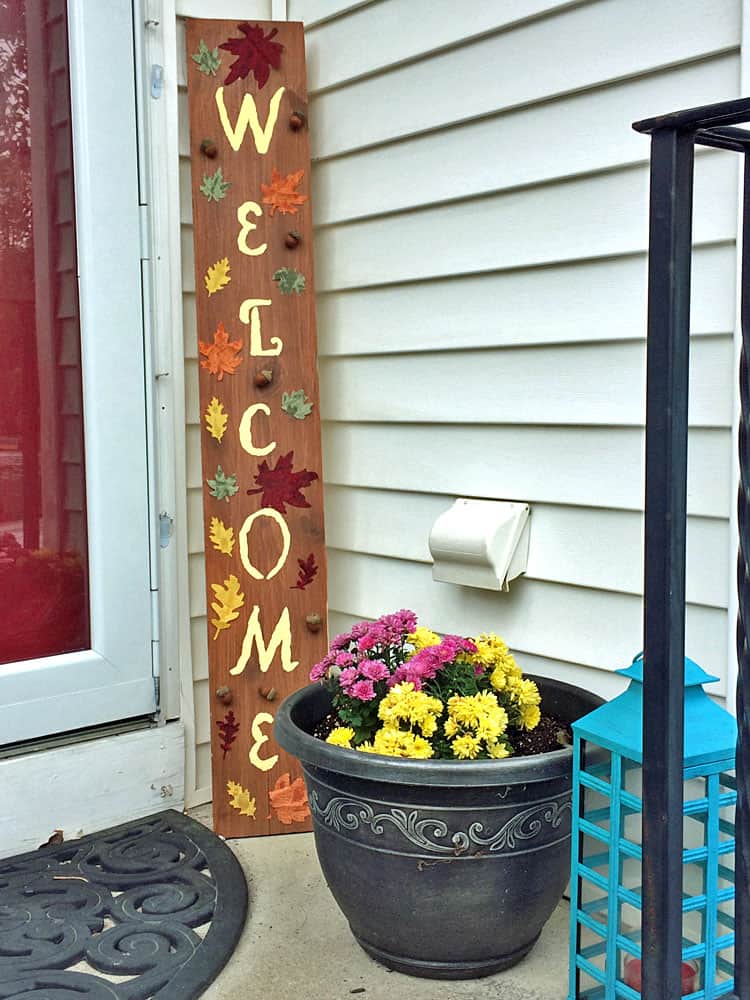
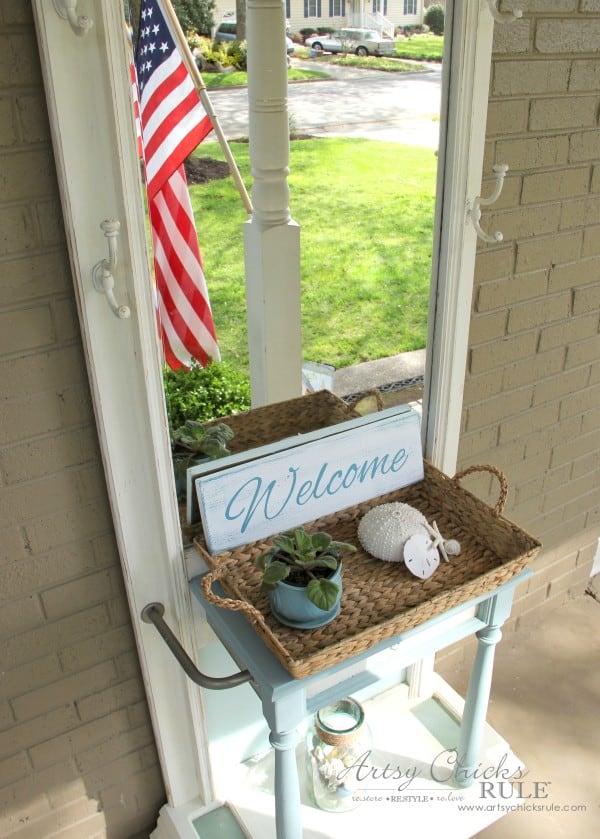
Easy Wide Welcome Sign
If you’re looking for a big welcome sign that’s able to really catch the eye of your guests as they arrive, then you’ll love this easy-to-make wide welcome sign. It’s genuinely easy enough for almost anyone to make, it stands on its own, and it even gives you a little platform for decorative planters, etc.
You’ll need several boards – exact sizes in the tutorial – some spray paint, other paint (for lettering), some tin cans, and then some basic hardware supplies and a miter saw.
Via Daddy By Day
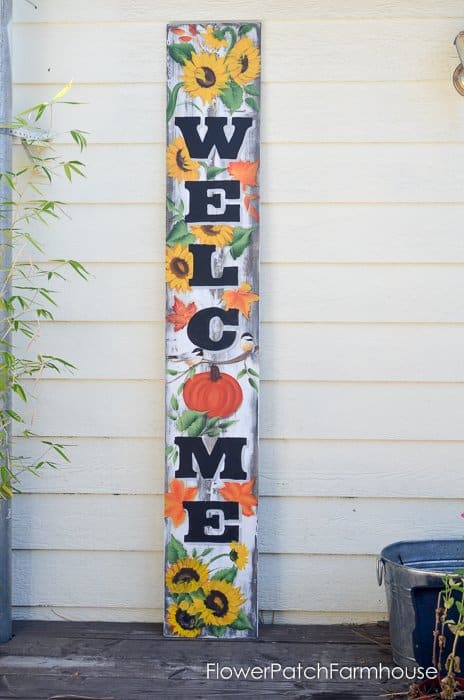
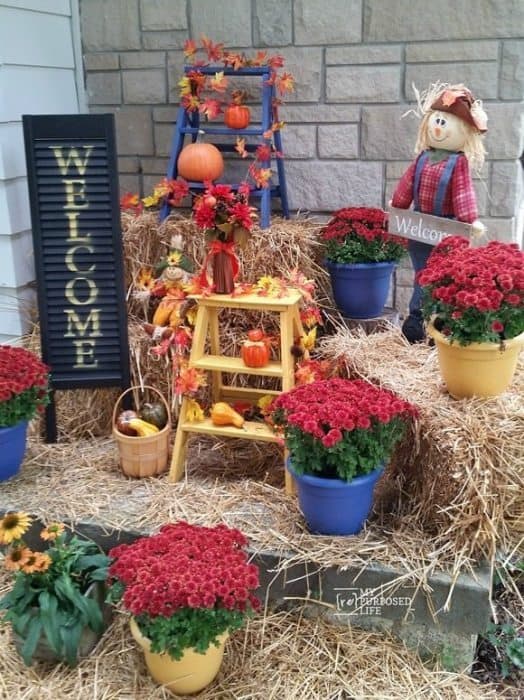
Distressed Wood Autumn Welcome Sign
This easy sign is the perfect way to show off a little fall color while welcoming your guests to any celebration you may have, be it Thanksgiving or an October birthday party.
There isn’t a set pattern per se, which is also nice, as it allows you to feel freedom in how you do the sign. There are tutorials on how to paint each element of the sign, including chickadees, pumpkins, sunflowers, autumn leaves, and the lettering.
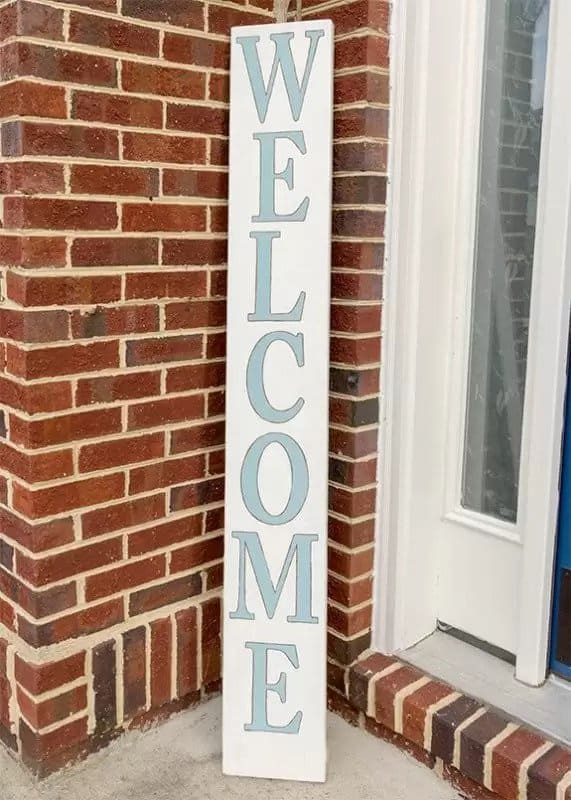
Farmhouse Style Welcome Sign
For this beautiful sign, you’ll need a long board, some stencil letters – 5-inches in height – acrylic paint, sealer, and some sandpaper. It’s a super easy tutorial that anyone can follow, and it results in a simple, but beautiful farmhouse style welcome sign that’s perfect for just about any porch.
The sign is perfect for larger porches and spaces where you want to make sure your guests know they’re invited in. And it only takes five simple steps to make it.
Via Farmwife Crafts
Easy Pallet Wood Sign

We couldn’t go through a tutorial list without having at least one pallet wood option, and this is ours: the easy pallet wood sign. It’s an extremely easy sign to make, but it looks gorgeous and as if you bought it from a fancy home goods store, thanks to its trendy style.
All you need to make it is an old pallet, a wire brush, some paint, and stencils for your lettering. It takes less than an hour, generally including drying time.
Via House by Hoff
Floral Welcome Sign With Pegs
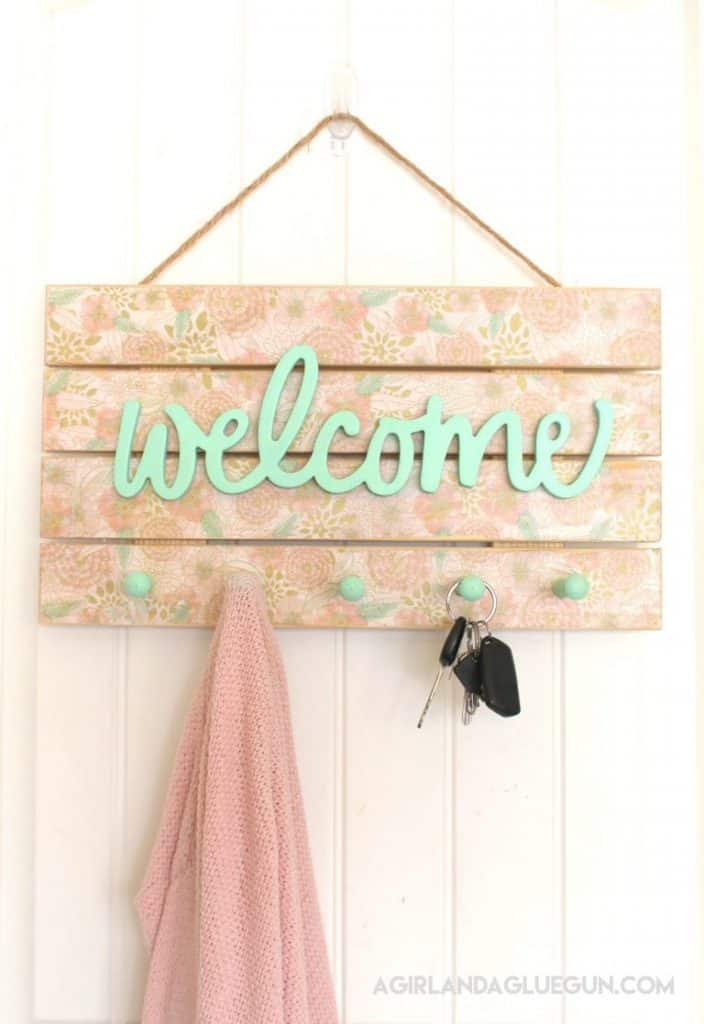
This sign design is super versatile, colorful, and attractive. And though the name is “floral,” you can choose any design you’d like to create the perfect fit for your home.
To make this sign, you’ll need some wood pegs, a blank wood sign from someplace like JoAnn’s or Michael’s, wood letters, fasteners, and your choice of scrapbook paper. It’s super easy to make and doesn’t take very long, so it goes up quickly for that special, unplanned visit.
Wood Lattice Upcycled Welcome Sign
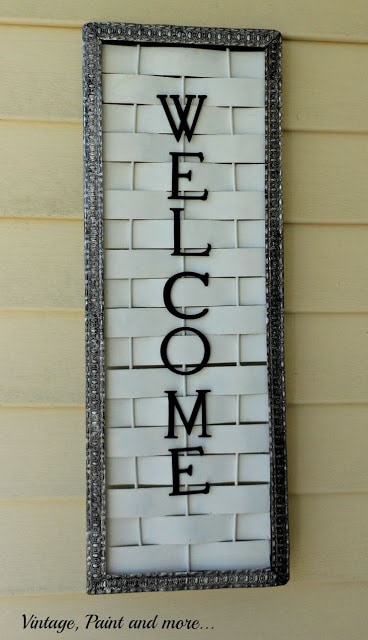
If you love upcycling, you’ll love this design. It uses up old pieces like woven lattice bits that you’ve just not been able to bring yourself to throw away but didn’t know how to use.
You’ll need that piece of lattice, a frame or edging pieces to turn into the frame, some decorative rope or braiding, paint, and some metal or wood letters to write out your message. The longest part of the project is the drying time for the paint.
Welcome Frame Door Hanger
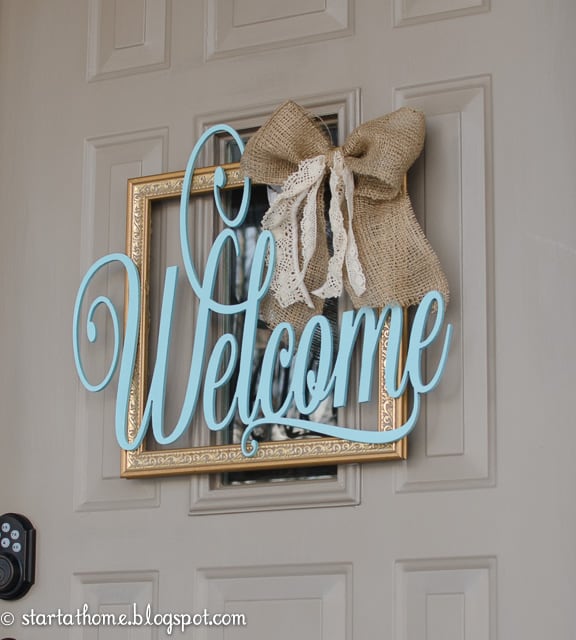
This welcome sign door hanger is absolutely gorgeous and so easy to make. And, even better, it’s super cheap. You’ll find the supplies for next to nothing at your local dollar store and craft shop, or you might even already have things lying around ready to use.
You’ll need a frame – this is the perfect time to revive an old frame that lots its glass – some lettering, spray paint, burlap, lace, and a hot glue gun. You’ll just do the few simple steps to paint and affix everything.
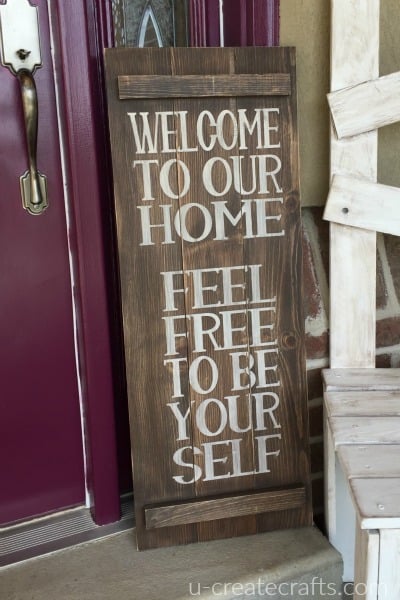
Rustic Wood Welcome Sign
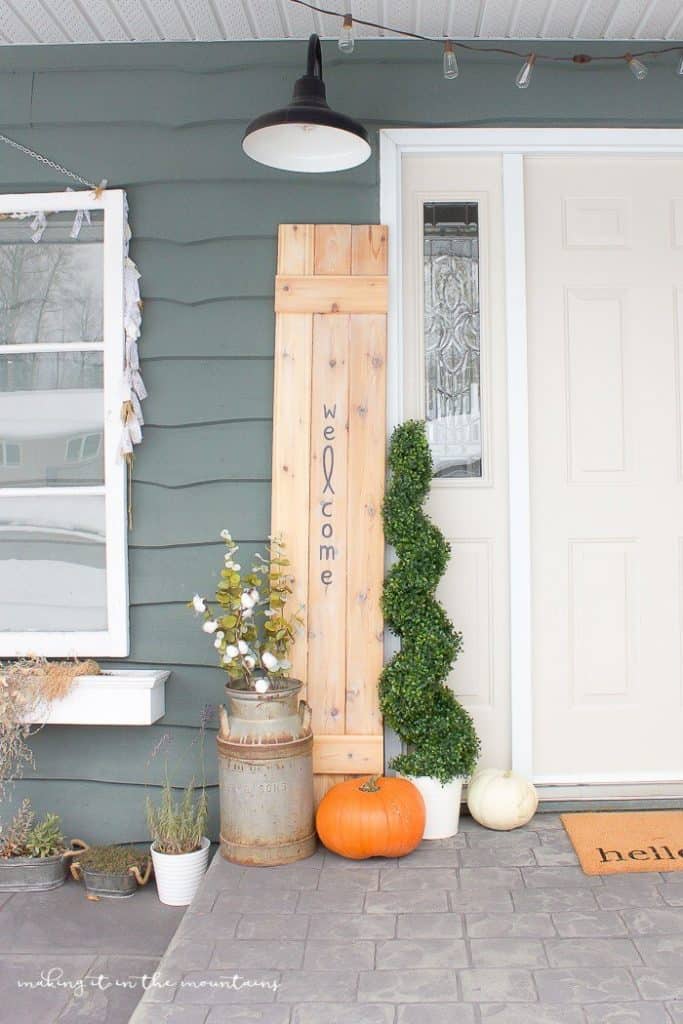
This DIY sign is so simple to make and looks completely lovely when you’re done. The only key is that you’ve got to hold those stencils steady when you trace them onto the board. If you can do that, then you can make this rustic wood welcome sign in about 10 minutes.
You’ll want to find a plain wood shutter – cedar and other decorative woods will look the nicest – some letter stencils (you can easily print them out from Word documents in your favorite font), and a Sharpie.
Via Making It In the Mountains
Hanging Welcome Sign with Planter
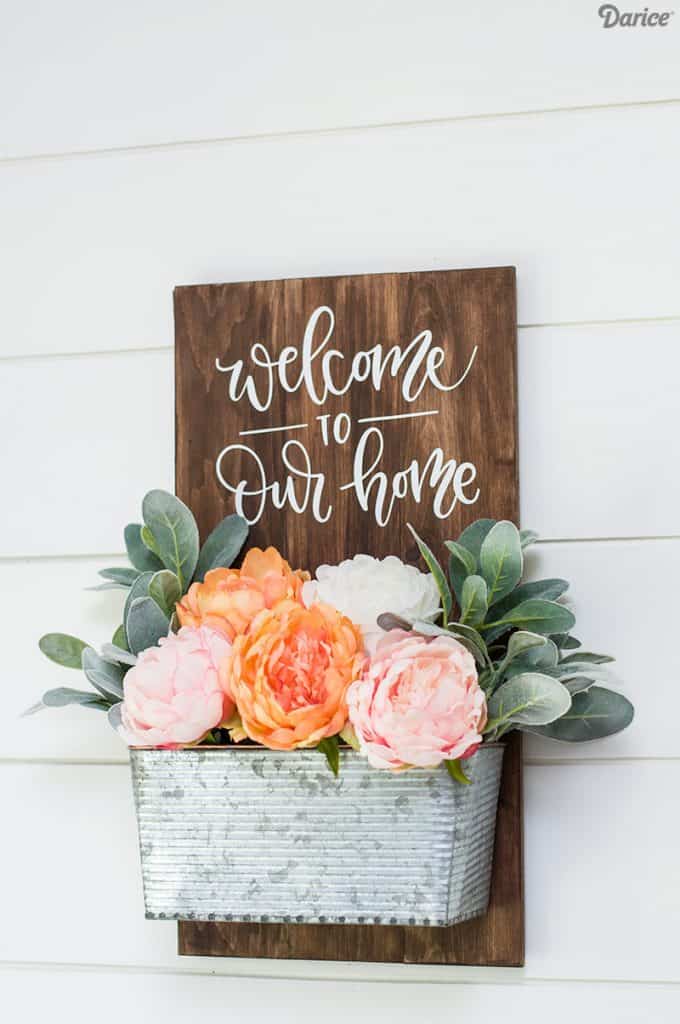
Here’s another beautiful welcome sign with a planter that might fit your style if the previous options weren’t quite your thing. You’ll just need a pallet sign – unfinished – a wall planter, some stain, vinyl, and silhouettes and transfer paper.
The sign seriously looks like something you’d order from an expensive catalog, so if you can follow the plan carefully, you’ll impress all your friends when you tell them it’s homemade. Just be careful to choose your silk flowers carefully.
Via Darice
Autumn Leaves Welcome Sign
Another beautiful autumn-themed sign is this falling leaf welcome sign. It’s perfect for an afternoon project some late summer or early fall day as you prepare for the season change.
To make this beautiful, textured sign, you’ll need a lovely piece of hardwood. You’ll also need some burlap leaves, some wood stain, craft faux acorns – or pinecones if you like – and a hot glue gun and lettering supplies. The stain will take a while to dry, but otherwise, this is a very quick afternoon project.
Via Mom Home Guide
Stenciled Wood Front Porch Sign
This attractive, rustic welcome sign is another super simple project that everyone will think you got from some boutique, especially if you personalize the writing to match your family’s motif. But it’s super simple and fairly quick to make.
You’ll need a slat board or wood sign – Amazon and The Wood Connection have some great options – dark wood stain, light-colored complementary paint, sandpaper, foam brushes, sealer, and stencils. Your supplies should cost you less than $20 for this gorgeous sign.
Via U-Create Crafts
“Welcome to the Porch” Message Sign
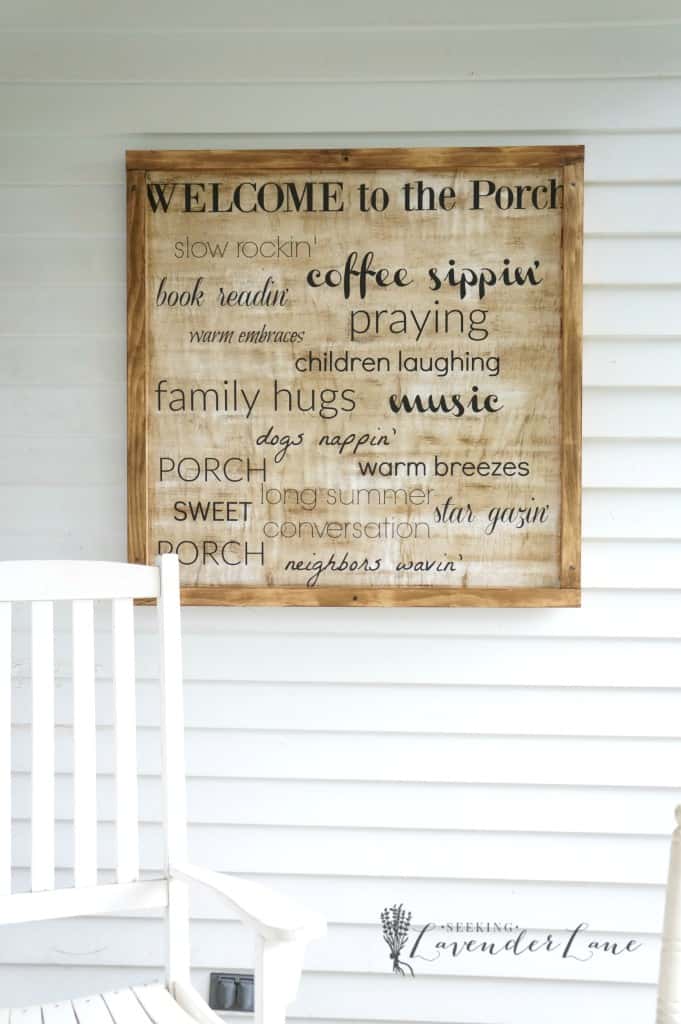
This super fun sign is uber customizable for your family’s outdoor preferences. It starts with a rustic wood sign and turns into a word collage of all your porch goings-on.
You can either start with a printout from Staples for the lettering or find stencils, stamps, or other lettering options for whatever message you want on your welcome sign. From there, you’ll need some plywood, wood for the frame, Mod Podge, and some dark wood stain.
Simple Distressed Wood Welcome Sign
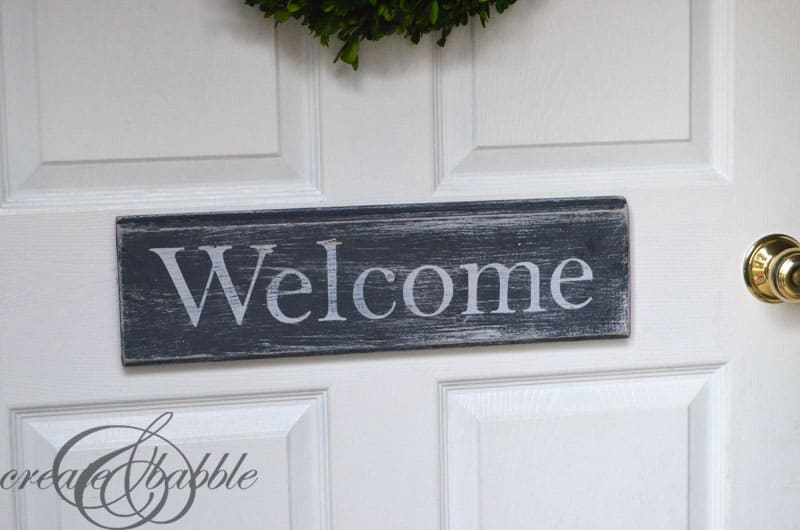
This is the perfect welcome sign design for the woodcrafter who’s got some scraps lying around unused. Just grab a single piece of wood the length and width of the sign you’d like and you’re all set.
You’ll also need some white paint, black chalky black paint, sandpaper, and a transfer silhouette. It’s super easy and super attractive. And, generally, costs less than about $10 to make. Just give yourself enough dry time between each coat.
Large Shiplap Welcome Sign
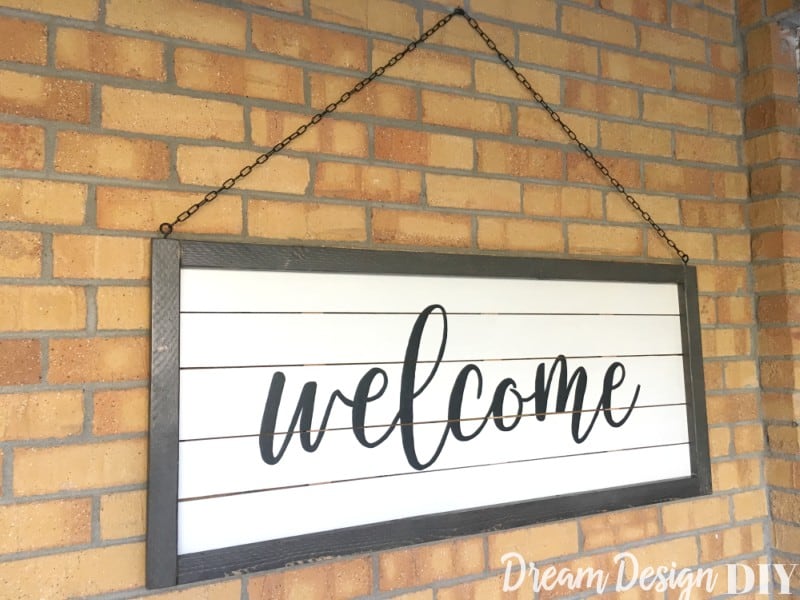
If you love shiplap wood, then you’ll love making this welcome sign of shiplap panels and framing. It’s a bit more extensive a supply list and tutorial than most of the others on here, though, so be prepared for some extra work and time.
To make this, you’ll need some basic tools like a measuring tape and pencil. You’ll also need a nail gun, carpenter square, miter saw, table saw, and a sander.
Via Dream Design DIY
Super Easy, Inexpensive Welcome Sign
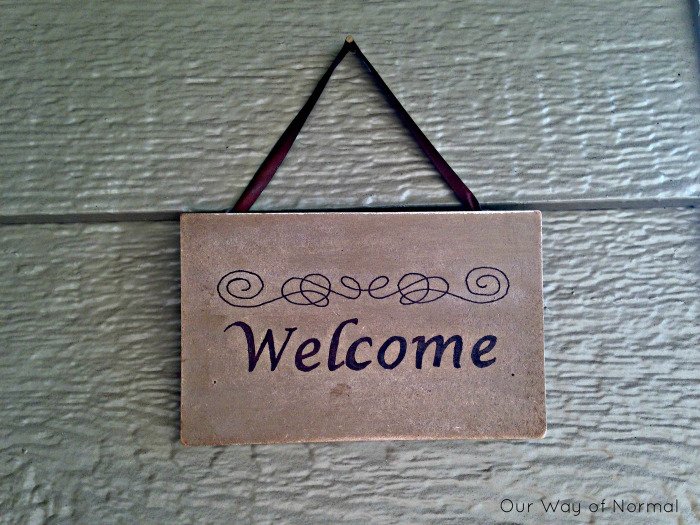
Now, if you want something super easy and inexpensive, then this is your project. All you need is a piece of scrap wood (or an old sign you want to upcycle), some ribbon, spray paint, and a Sharpie. And you’ve already got most of these things lying around the house.
Follow the super easy to follow tutorial, and in less than an hour, you’ll have this gorgeous little sign welcoming your guests in.
Easy Thrift Store Welcome Sign Upgrade
Thrift store shoppers will love this one. Especially if you’re one of those folks who sees something cool and just grabs it, not knowing when or how you’ll use it. Because, well, you’ve probably got a couple of signs hanging around at the back of the closet, just waiting to be upcycled.
To make this upgrade, you’ll just need to grab that old sign out of the corner, get some paint out, grab your hairdryer for crackling the paint, and follow the super easy instructions for creating this gorgeous sign.
Hello Sunshine Welcome Sign
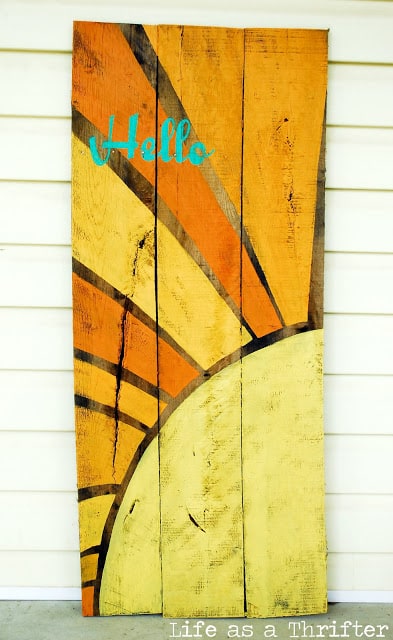
This one is great for freehand artists who want some happy sunshine to add to their porch or deck. You’ll have to create a wood pallet canvas first – which is super easy to do – then you’ll need to figure out your exact design for the sun and lettering.
From there, you’ll apply the design to the wood, attach a hanger, and voila! Your guests feel welcomed by the sunshine of your love and craftiness.
Upcycled Old Shutter Sign
We love upcycling old things, especially beautiful things that are still in good shape but not terribly useful as-is. And with this tutorial, you can create something incredibly simple and attractive in a very short time.
You’ll need a shutter – the original crafter used half of a bi-fold door – a welcome stencil, some paint, some spray paint, and some Press-n-Seal to finish the whole thing off. The best part is you can completely customize the look of the sign by choosing whatever type of shutter you want.
Repurposed Vintage Headboard Welcome Sign
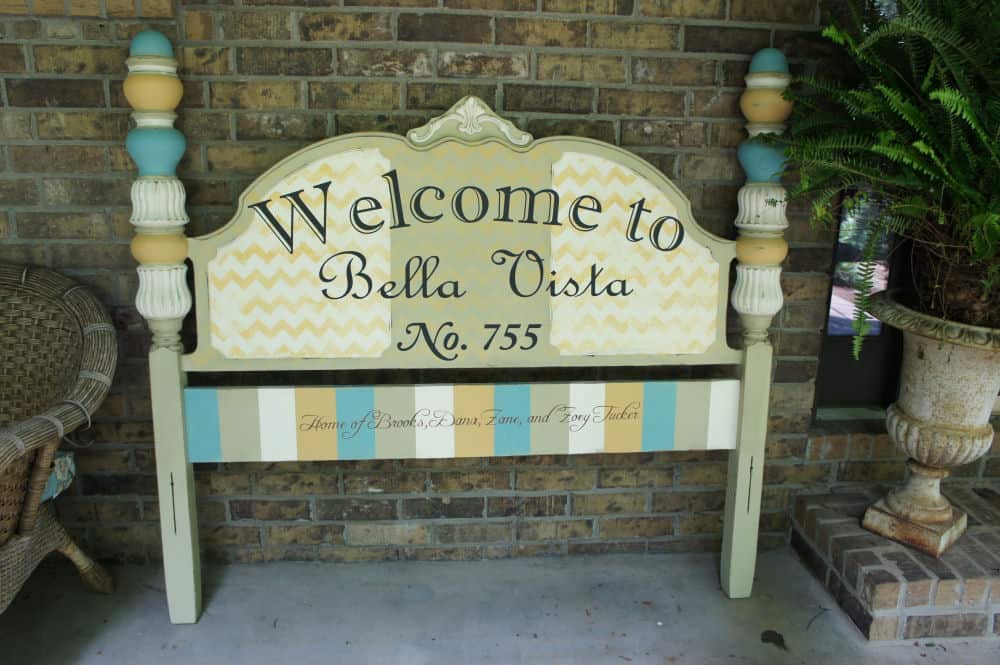
For another fun repurposing project, you can find an old headboard in the basement or at a thrift store and turn it into your new welcome sign.
This particular tutorial gives exact instructions for the special design for a family, but you can take pretty much any of the sign concepts from elsewhere in the article, as well. And whichever way you go, it’s super simple, beautiful, and truly a unique sign to welcome in your guests.
Via Bella-Tucker
Barnwood Welcome Sign

This one uses very similar instructions to several of the sign building processes in other tutorials, but it specifically calls for old barn wood for a reclaimed wood project. We love reclaimed wood, upcycled anything, and upgrades of common objects that would otherwise be considered scraps or junk.
So, use this tutorial to craft that old barn wood into something utterly beautiful and welcoming for your guests. Just grab that barn wood, some stain, and paint and stencil, and you’re all set.
Via Lemons, Lavender, and Laundry
Salvaged Drawers Welcome Sign
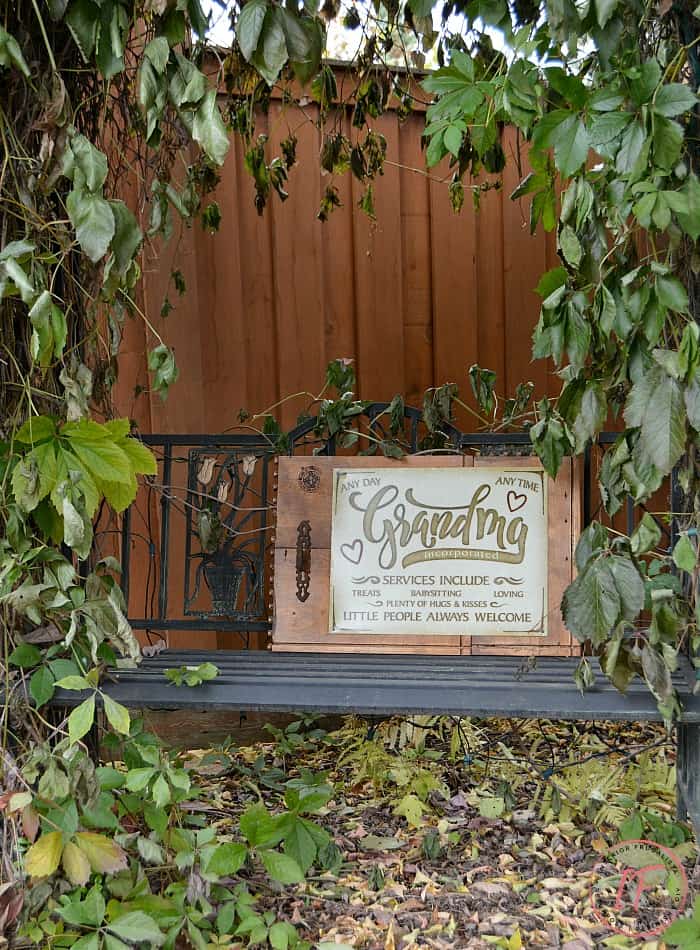
Technically, the design on this one says “Grandma,” but with minor tweaks, it will make a beautiful, chic welcome sign. And it’s another great way to salvage “junk” into something beautiful that you and your neighbors and friends will love.
Find an old vintage drawer on some falling apart furniture and a vintage drawer pull to create this truly unique sign for your front porch. You’ll also need a rust metal effects kit and a tin sign and fasteners to put this together.
Reversible Holiday or Welcome Sign
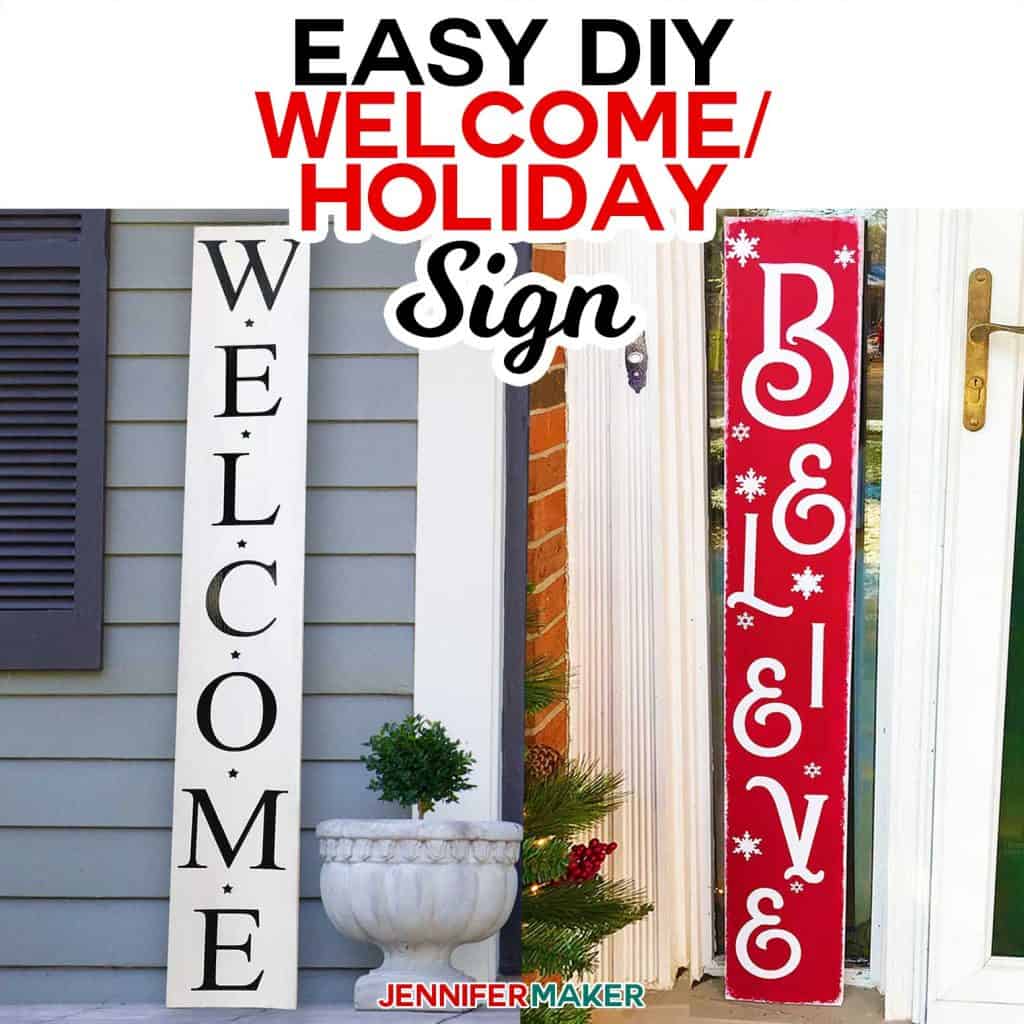
Here’s another great reversible sign for your home. You can welcome the guests with one side and celebrate the holidays with the other. You’ll need a piece of wood for your base, some permanent vinyl, some paint, sandpaper, and a cutter for the vinyl.
Follow the super simple instructions to create the sign using the free SVG/DXF/PDF cut file provided by the crafter. You’ll love the result of your simple efforts.
Via Jennifer Maker
Welcoming One and All With Your New Sign
Each of these tutorials offers a unique twist on a welcome sign to help your home feel even more inviting and warm. The different styles and designs fit different occasions, themes, and styles of landscaping, so you’re bound to find at least a couple that you love.
Then, to add some texture, you may want to find some additional décor ideas to upgrade the rest of the porch, lawn, or front patio. Having versatile pieces that can be shifted and moved around by season is probably your best bet, though, to help prevent you from getting bored with your yard.