31 DIY Computer Desk Ideas in 2026
Desks are a necessary furniture item in the majority of our homes. But finding the right one can be difficult. Especially if you have unique taste, distinct needs, tight budget, or generally just don’t like most of the options out there.
So, you can save some money and frustration by building your own. And these fantastic how to build a computer desk plans offer some beautiful options in a wide range of styles. Check them out – you just might find the perfect project.
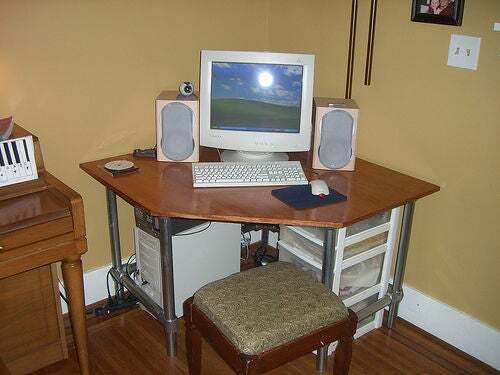
Simple Birch and Aluminum Desk
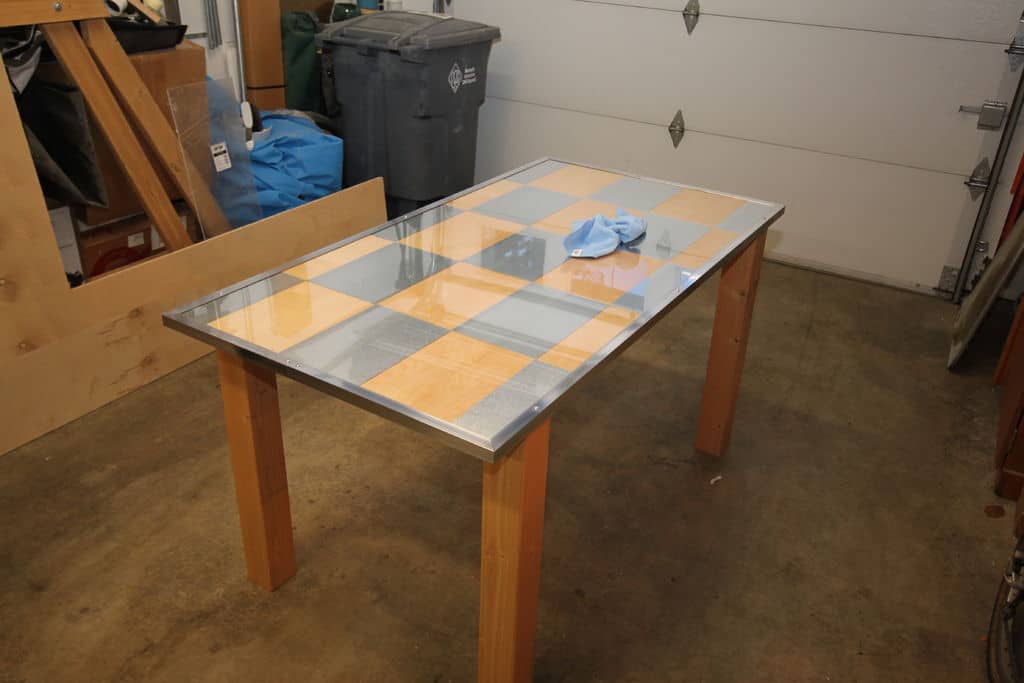
This beautiful but simple to build desk is designed as a kind of all-purpose computer and office desk. It’s large enough to spread out a textbook, laptop computer, and a writing notebook together. It’s got sturdy, durable legs that don’t wobble and provides interesting nooks and crannies for storage.
The desk is made from birch plywood, an acrylic sheet, Douglas Fir, an aluminum angle, galvanized steel flashing, screws, and some other basic supplies and tools.
Via Instructables
Ikea Hack Double Decker Standing Desk
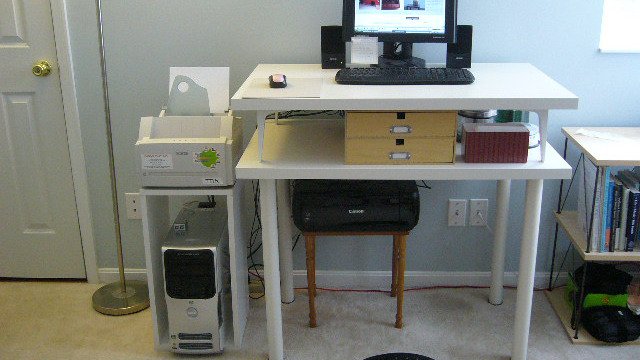
If you’re looking for a good, affordable take on the popular standing desk, then this Ikea hack idea is a great choice. It’s super cheap (under $30) and easy to put together. You just need some Ikea standards to start.
You’ll need 2 Vika Amon tabletops (or similar if no longer available), 4 Vika Curry legs, and 4 Ekby Stodis brackets. It’s very simple and perfect for the quick throw together project in an hour.
Via LifeHacker
$30 Wooden Desk
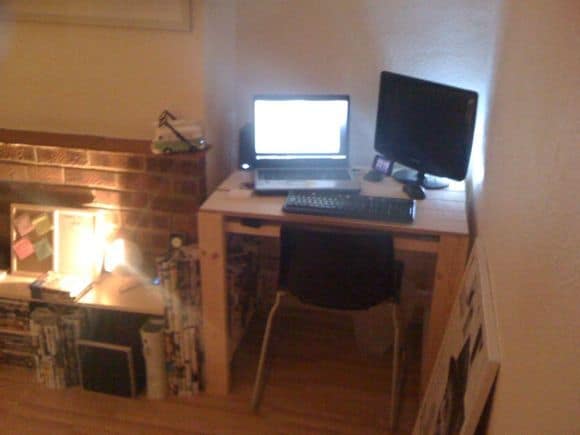
This is the perfect small desk for the less tool-inclined to build. It’s super inexpensive to build, too, which makes it perfect for most of us. You can use some wood from the hardware store or even just grab some scrap wood. The tutorial includes clear photos and easy step-by-step directions.
You’ll need various wood pieces (spelled out in tutorial), some plywood, wood glue, multipurpose screws, and a drill with a few different bits.
Via Instructables
Pottery Barn Inspired Corner Desk Upgrade
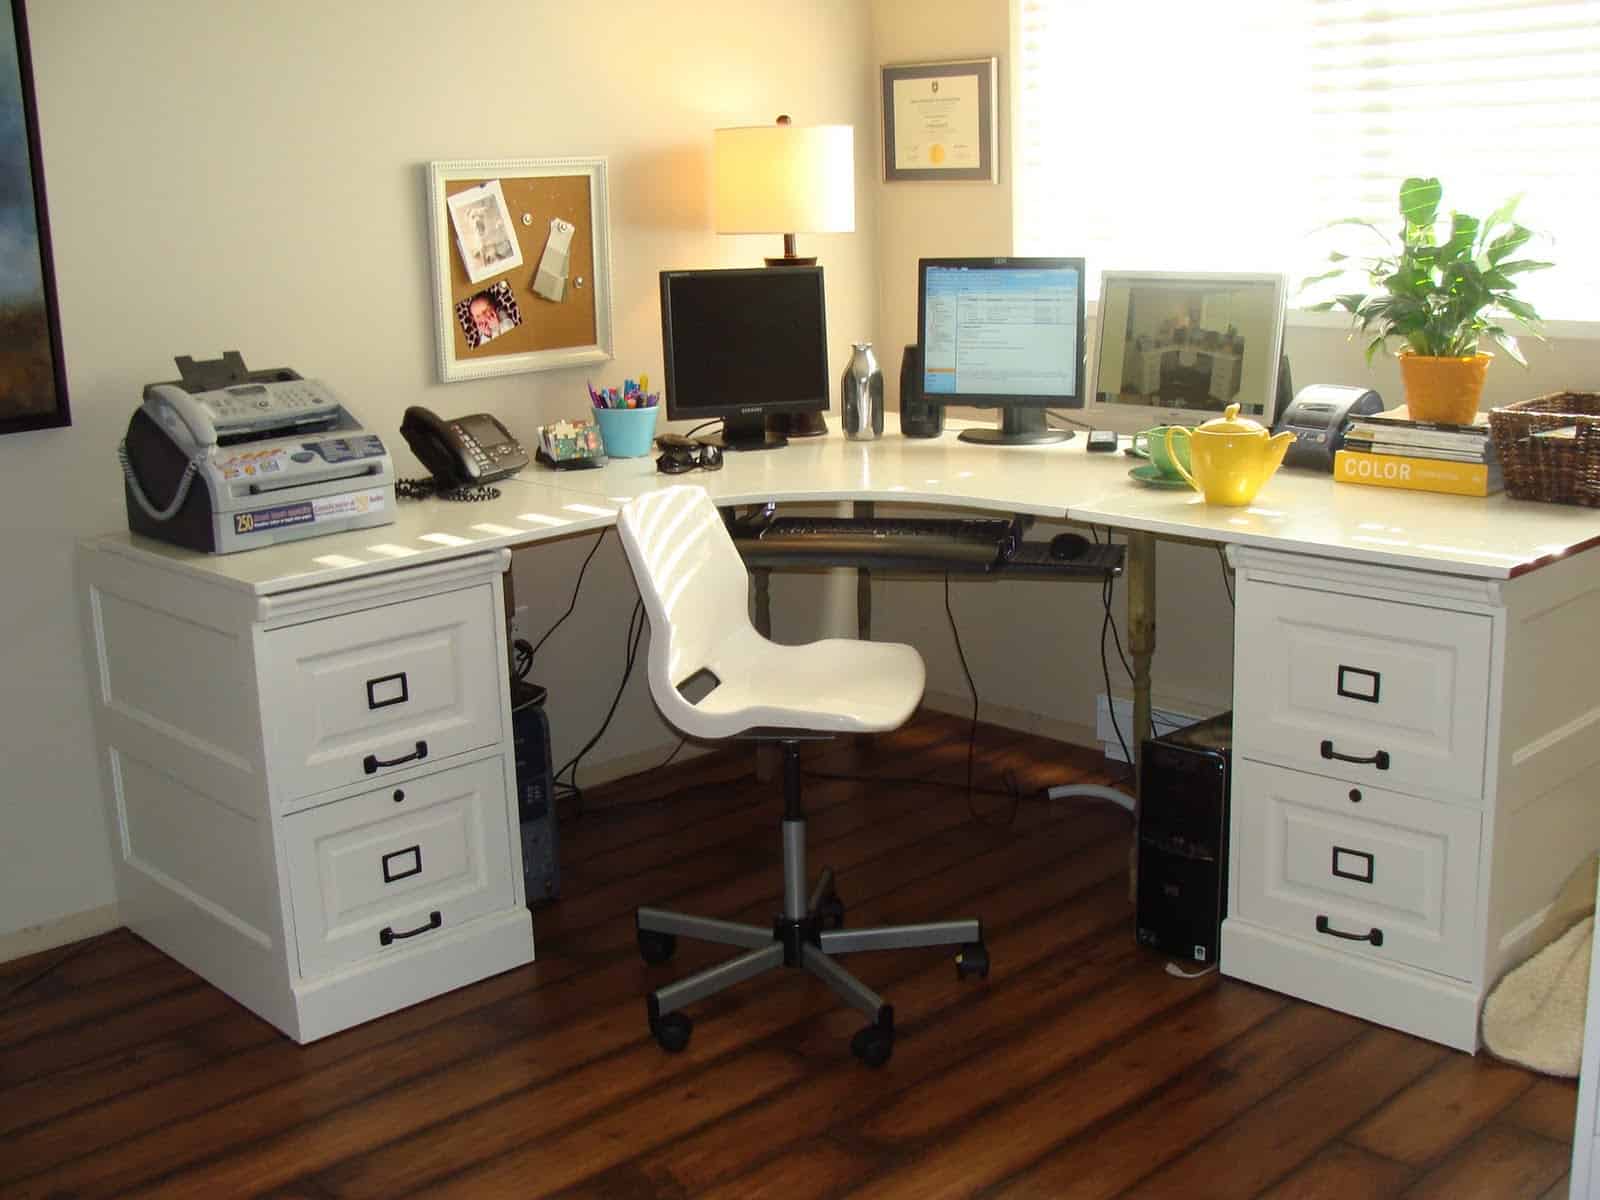
This desk was inspired by a Pottery Barn desk that was beyond the original crafter’s financial means – or at least willingness to pay. The crafter used an old desk, some wooden file cabinets, and some braces to build the desk.
It’s really just an upcycle for the old furniture, with a coat of paint and a little creativity. You can, of course, tweak to match your specific needs. It’s a pretty easy idea to follow to get what you really need and want.
Via Ikea Hackers
Mobile Standing Desk with Built-In Outlets
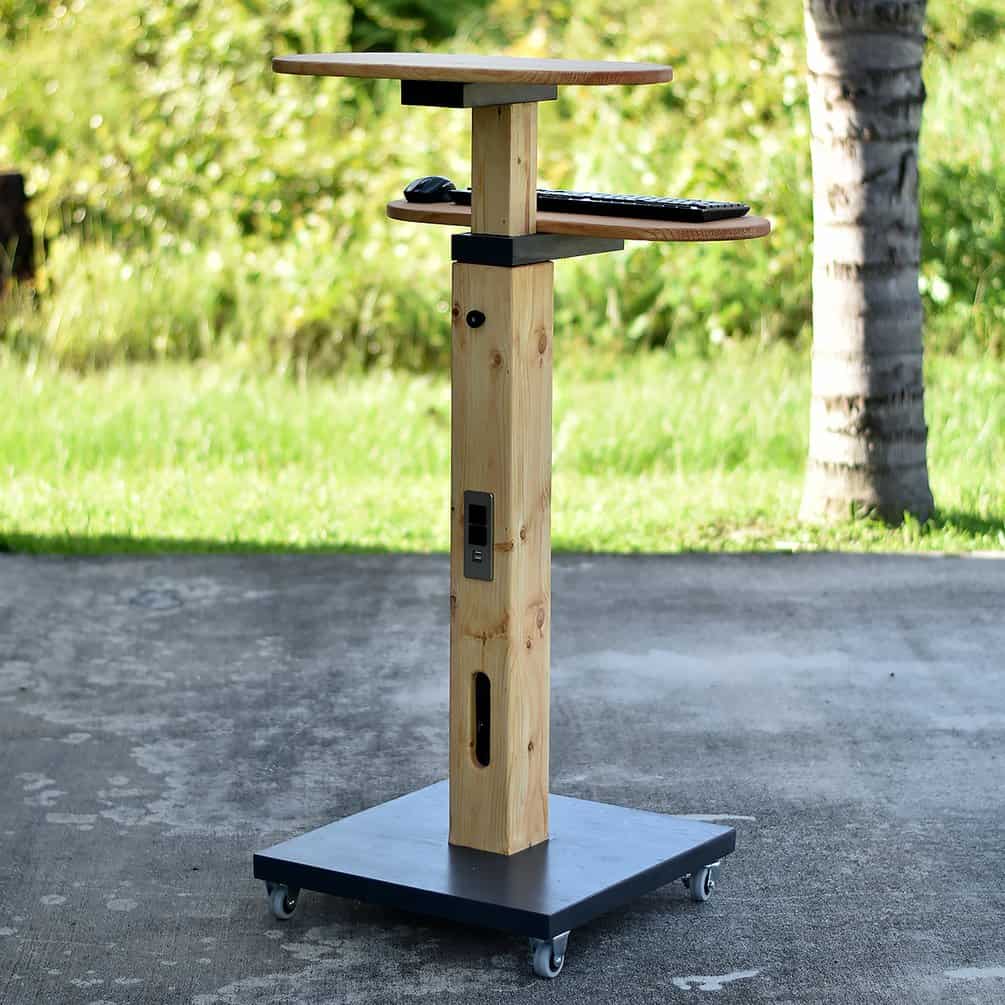
This is a super unique option for the folks who want a standing desk, especially if they tend to move around a bit. This mobile workstation is super convenient for working from anywhere – seriously, anywhere at all.
The plan costs about $5 and gives really great detail on exactly how to build this beautiful mobile standing desk, including a couple of outlets and USB ports for charging whatever devices you need to.
Simple Modern Computer Desk
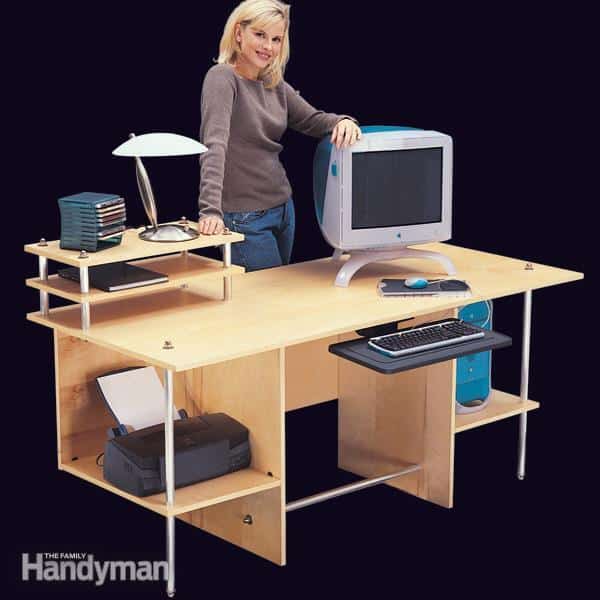
This simple, modern computer desk is pretty easy to put together. And you can decide how much it costs, based on the supplies you choose to use to build it. The original post says it can be anything from $100 to $500, depending solely on your personal choices.
The sleek desk offers two shelves, the tabletop, a keyboard platform, and two tabletop shelves for supplies. The best part is that though it offers loads of surfaces and flexibility, it’s a beginner skill project.
Via Family Handy Man
Long Pipe Desk
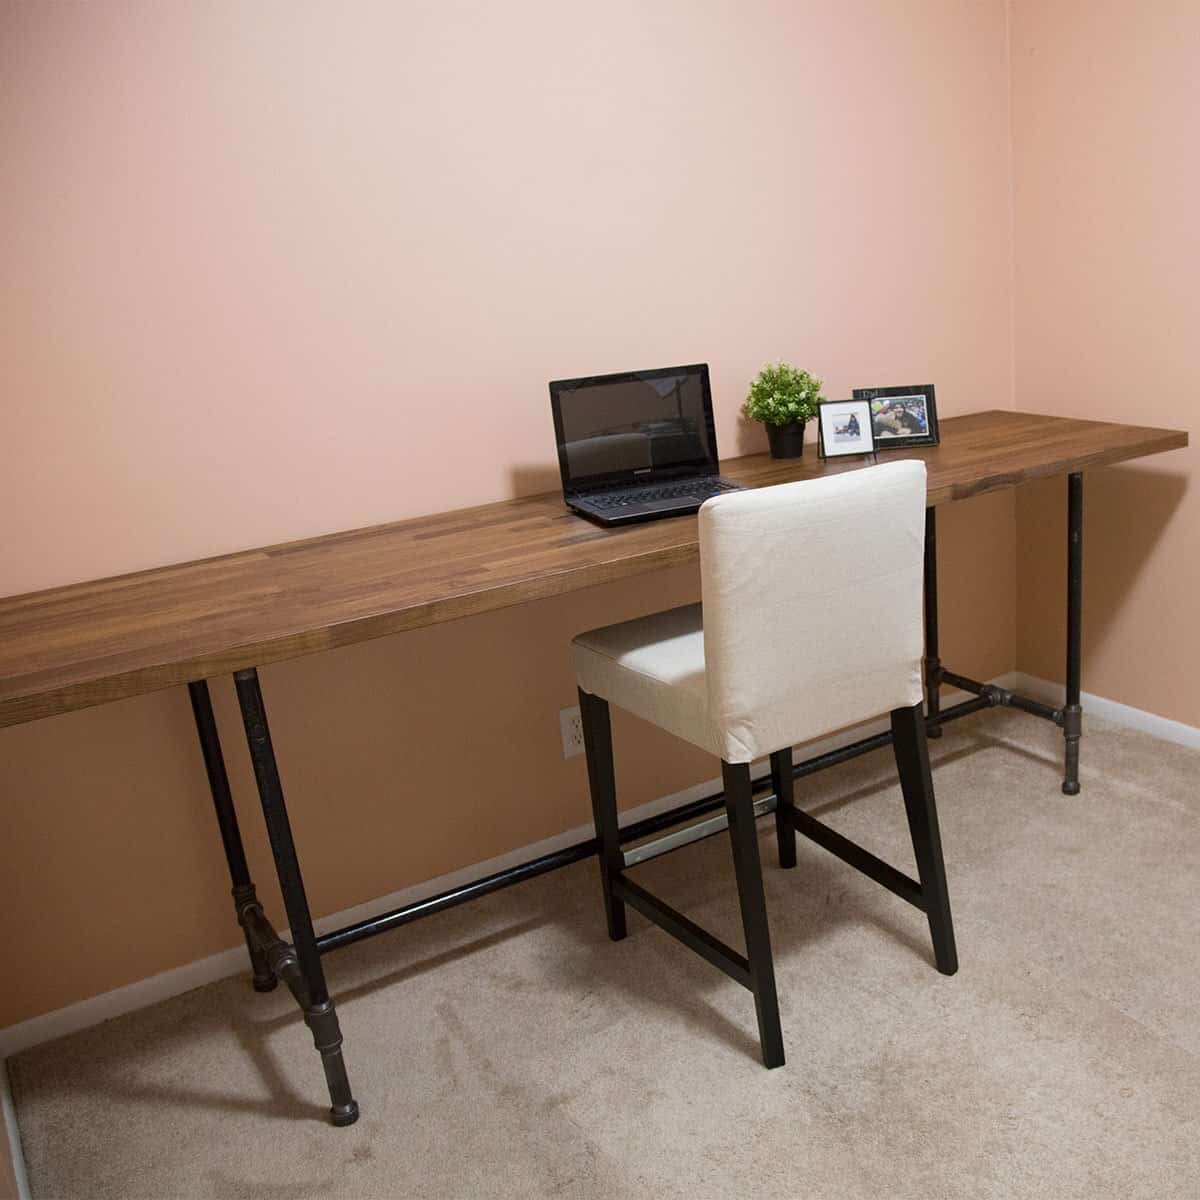
This is the perfect desk for anybody who’s looking for a long tabletop. It’s attractive and looks like a pro made it. The industrial-style framework is made of pipes and the top is a walnut wood countertop. It doesn’t cost much – if you find the right supplies – and is easy to make.
You’ll also see some tee fittings, caps, floor flanges, and screws to put it all together. It’s a pretty simple, easy desk to build for most skill levels.
Via Family Handy Man
Heavy-Duty Computer Desk
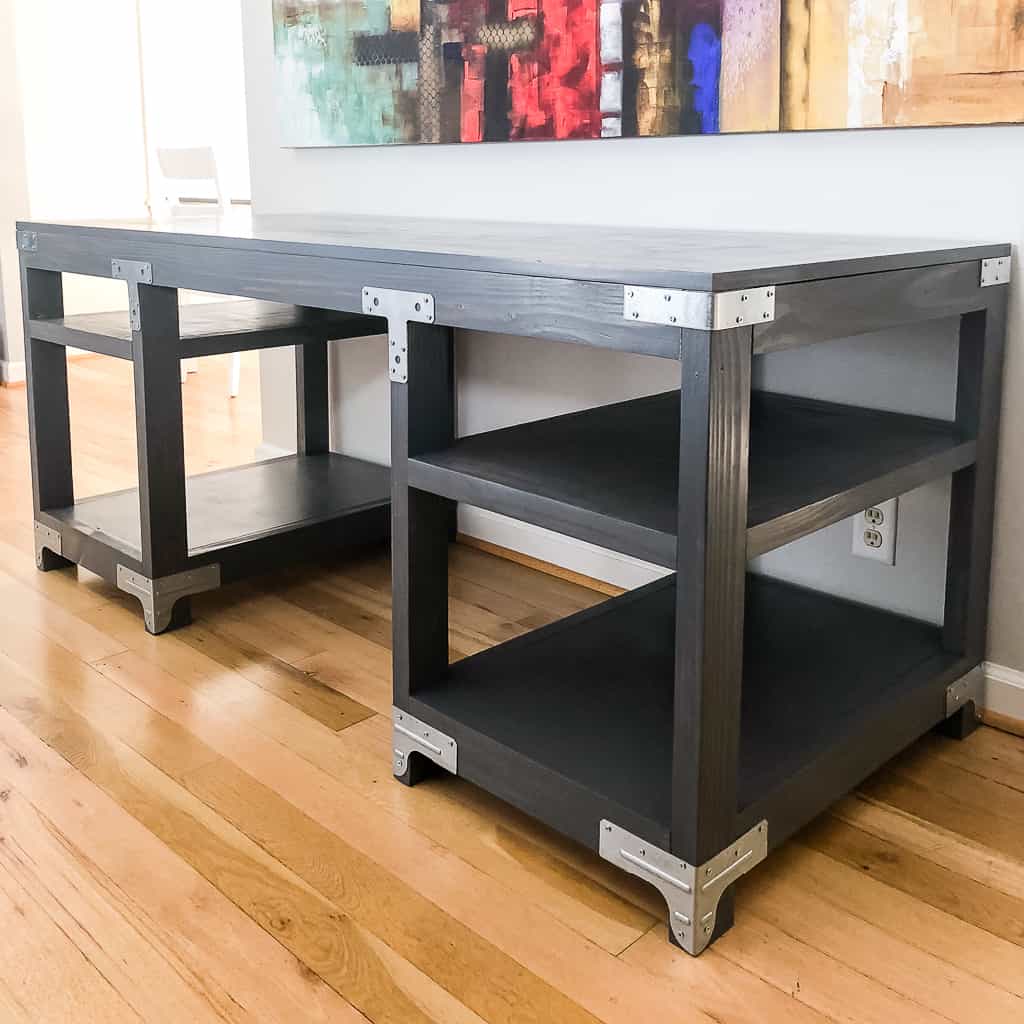
This amazing desk is a heavy-duty option for the folks looking for a super attractive option that can take rough handling. It’s got loads of storage, too, with four solid shelves and a large desktop that can easily handle a computer, textbooks, paperwork, or pretty much anything else.
You’ll need some plywood, 2x4s, sandpaper, pocket hole screws, wood glue, T-straps, rigid corner connectors, small angle brackets, and some other basic tools and supplies. You will need a Kreg jig, miter saw, and brad nailer, too.
Unique Custom Computer Desk
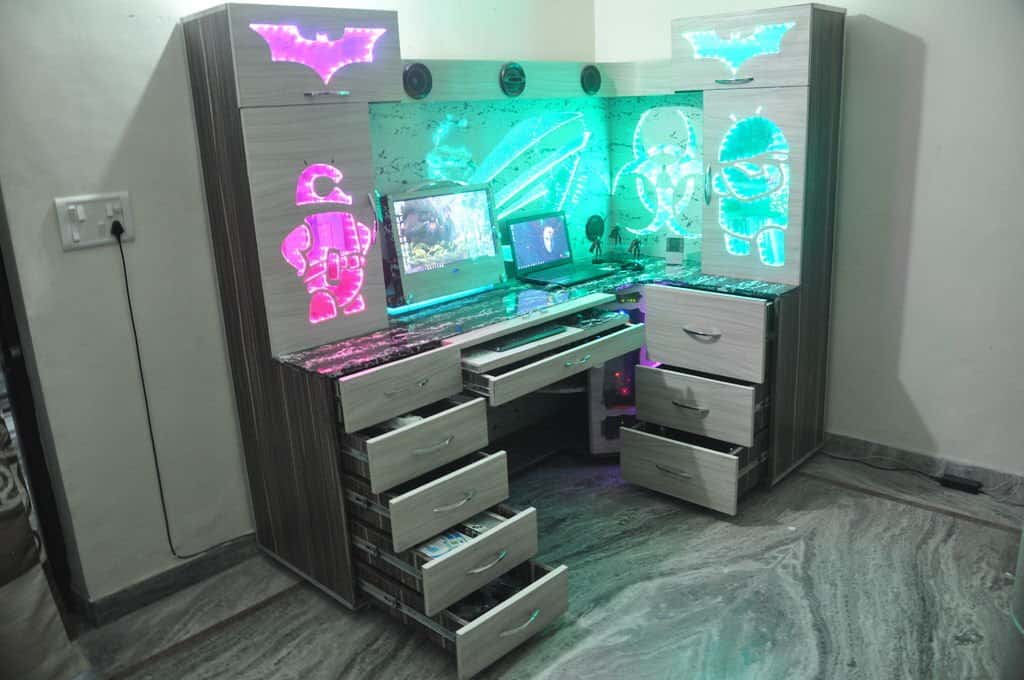
This is a fantastically unique computer desk that you can customize to your geeky heart’s content. The specific design offered includes logos from Batman, Biohazard, Android Authority, Android Central, and R.O.G. But if you love other options, you should be able to use the same techniques to modify for your needs.
This unique design includes LED lights to show off your logos, a speaker, and various other ways to build in your geeky tech. You will need some plywood, an acrylic sheet, a telescopic rudder, LED lights, and a few other things to make it.
Via Instructables
Sit/Stand Computer Desk Hutch
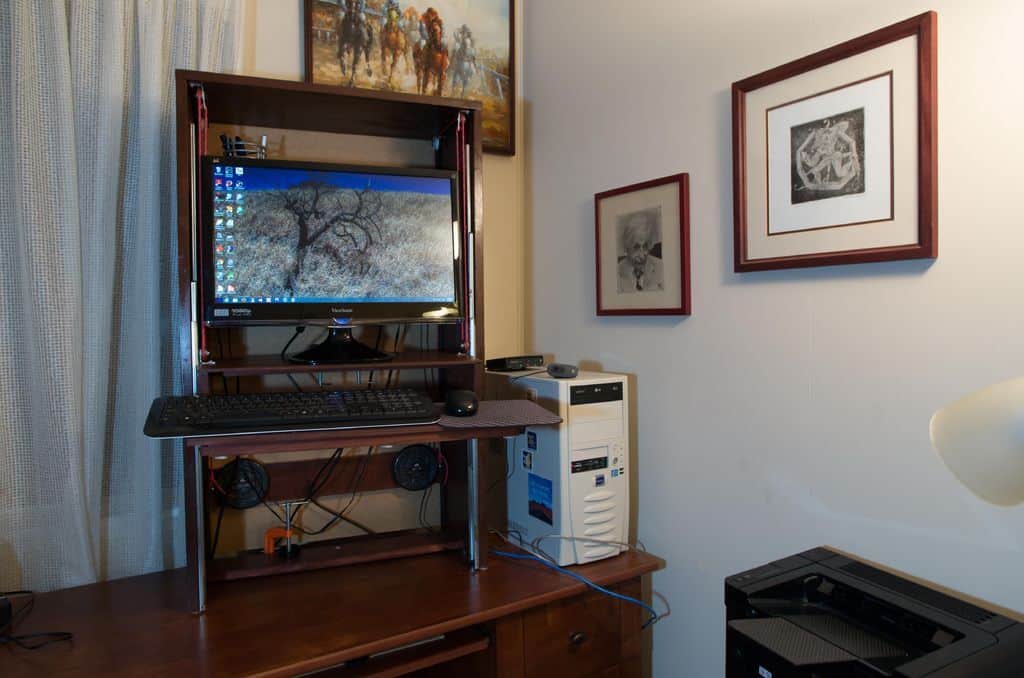
This is a fantastic option for adapting a desk into either a standing or sitting desk without compromising the other. You will need a hand saw, hacksaw, and a drill to put it together. And in just a few hours, you’ll be able to do whatever your hips and back need: sit or stand.
You’ll need some pine wood boards, two poplar hobby boards, drawer slides, shelves stands, patio door wheels, some hinges, wooden knobs, and c-clamps to put it all together in no time.
Via Instructables
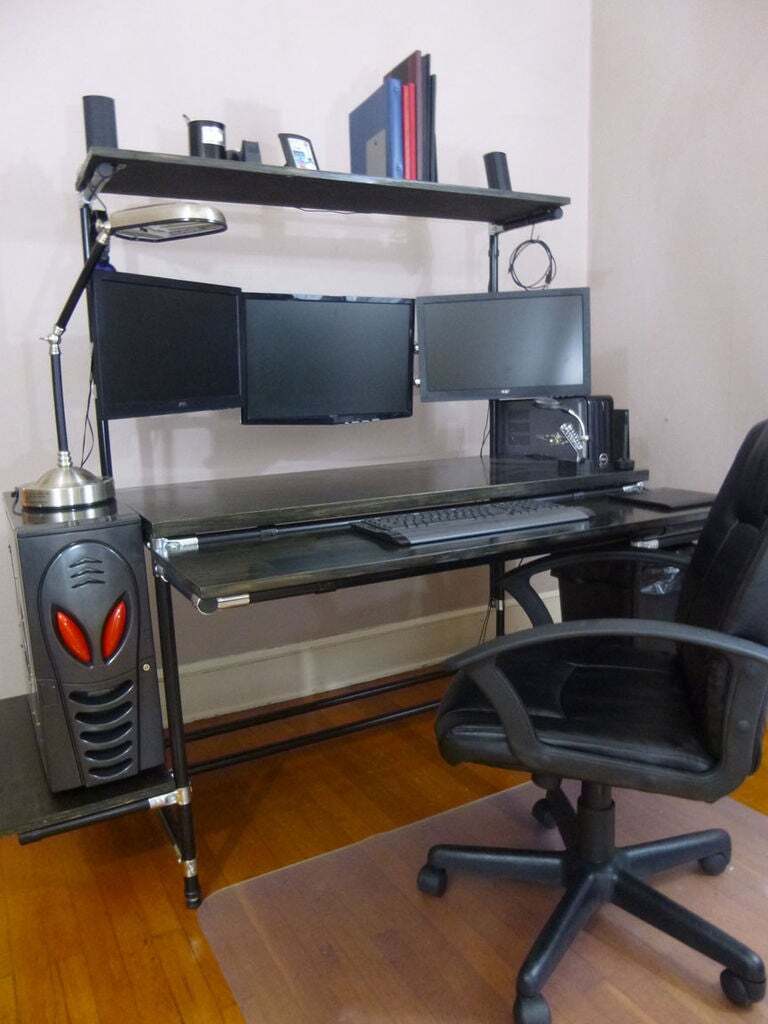
L-Shaped Wire Rack Computer Desk
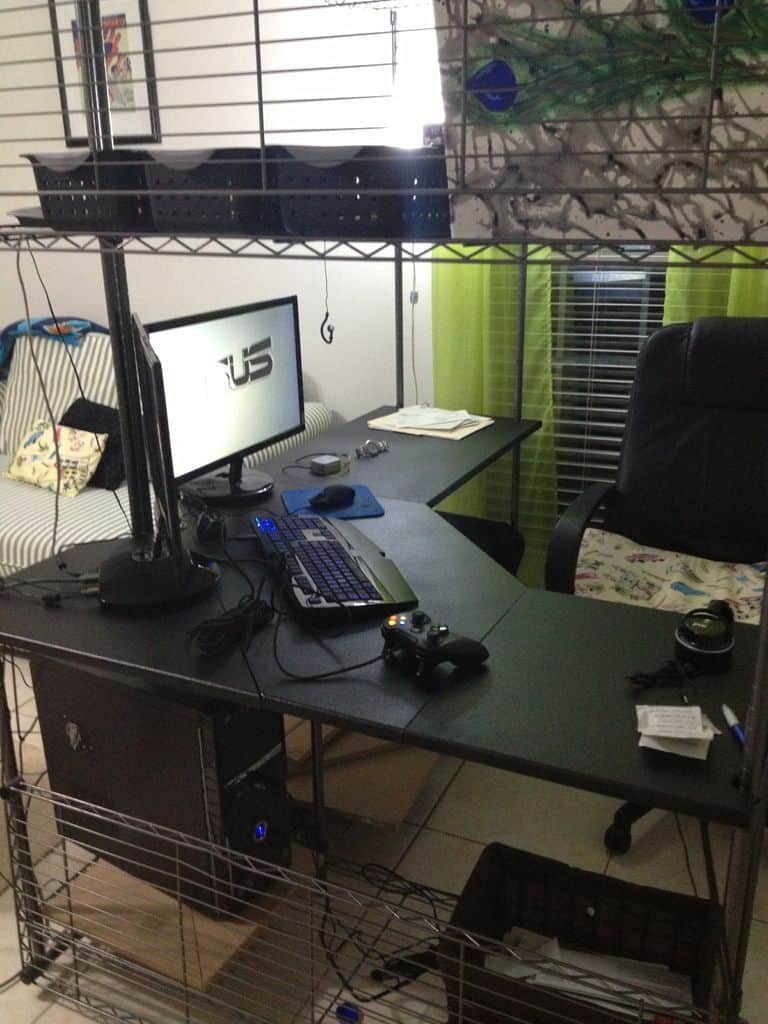
This is a great desk for gamers and folks who’ve got loads of tech and equipment to keep close at hand and cool. And, thankfully, if you’re not terribly handy, it’s a doable design. In fact, the original poster acknowledges that he is not a handy guy – so, you’ll be fine, whatever your skill level.
To build this ventilated computer desk, you’ll need some heavy-duty wire racks, heavy-duty zip ties, MDF board, some particle board, leak seal, spray paint, a router with rounding bit, a Dremel, and a circular saw.
Via Instructables
Pipe and Plywood Corner Desk
If you live in a tight space but need a good-sized desk anyway, this is a great option. It’s attractive and highly functional, and even has the option for adding curtains to cover up the gear and storage underneath, if desired.
It doesn’t require a lot of fancy power tools – just a circular saw, hex key, pipe cutter, and basic tools. You’ll need some plywood, pipes, a flange, socket tees, side outlet tees, and a plastic plug.
Via Instructables
$40 Stand Up Desk
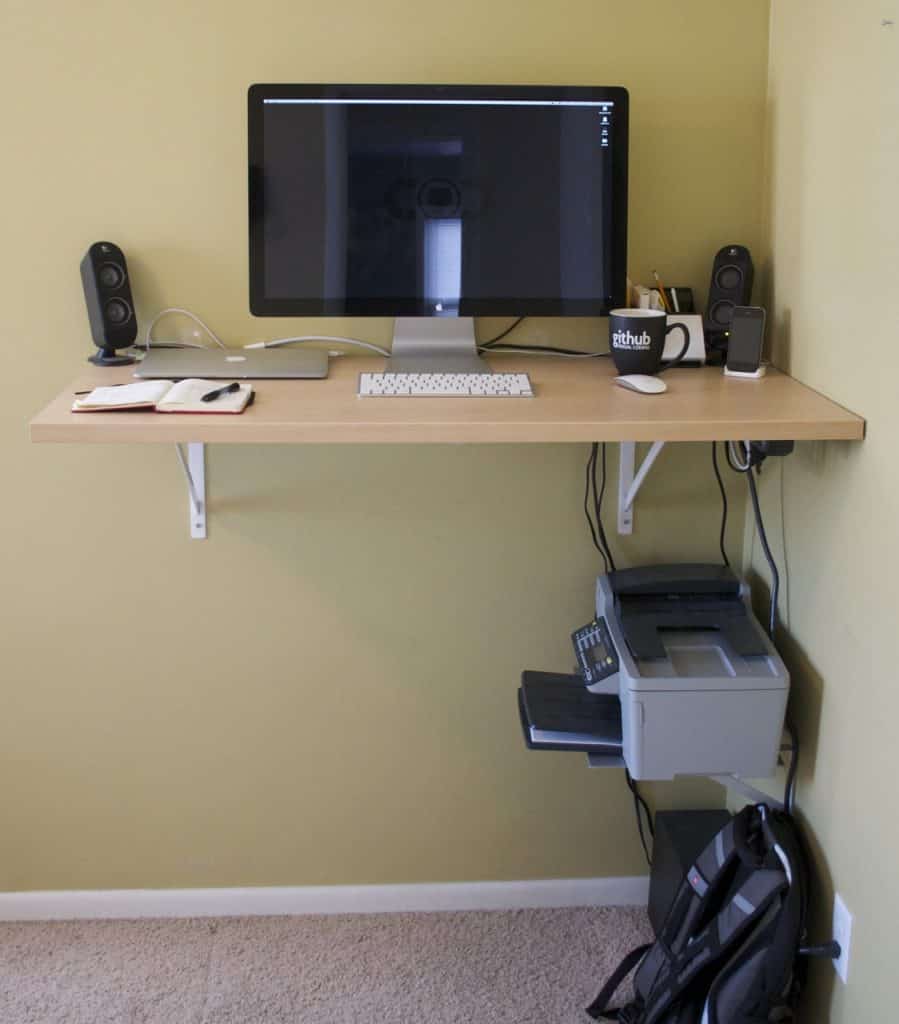
If you have a tight space and need a standing desk, this is the perfect simple design anyone can put together. It’s less than $40 for the nice wood and brackets. The design is specifically made to be adaptable and doable for anyone with a drill, even if you don’t have any skills with wood and construction.
You’ll need that drill, a level, tape measure, stud finder, and a pencil. The actual supplies you need are some shelf brackets and attractive wood.
Via Open Soul
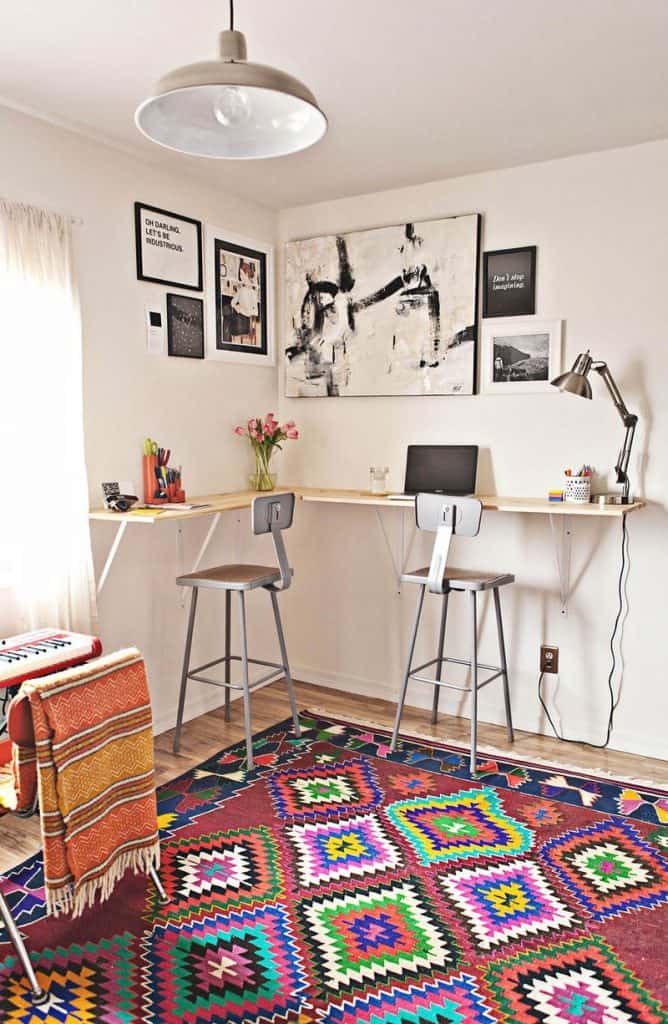
Space-Saving Tripod Desk for Two

Here’s a simple design that’s great for setting up a home office for two in a small space. It doesn’t require much work or expensive supplies. It’s a great little tripod setup that works well on any wall and could be tweaked easily to fit into a corner as well.
You’ll need some basic supplies like wood, L-brackets, etc. Just review the step-by-step “how I did it” plans to see what you need to do to create your own.
Via Instructables
DIY Treadmill Desk

Standing desks are great, but if you’re looking for more than just that – but a treadmill desk, this is a great design that won’t cost much. This particular Instructables offers three different designs, too, for building a treadmill desk of your own.
You need a treadmill, of course, and some basic supplies to build this super-simple option to help keep you active while you work at the computer. The design is more of a “here’s what I did” for inspiration to create your own.
Via Instructables
$30 Aluminum Computer Desk
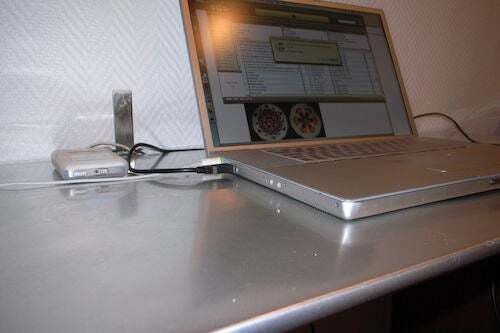
This sleek, beautiful desk is perfect for the compact life. It recycles old material, doesn’t cost much, and is fairly easy to make by just about anyone – skilled or not. You’ll need some boards – specifically one the size desktop you want – some offset boards, brackets, and some basic tools.
To get the offset boards, you’ll need to call the local paper to see if they’ve got some hanging around – making this a super cost-friendly project.
Via Instructables
Concrete Computer Desk
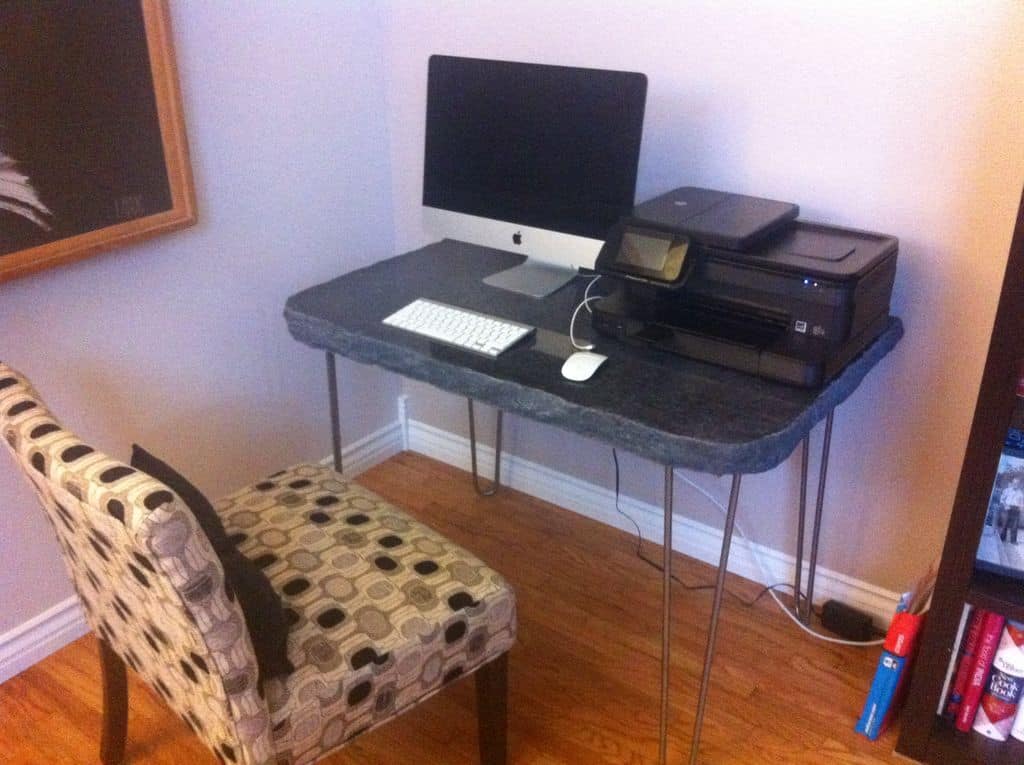
If you love the look of polished concrete, you’re going to love this computer desk design. This was originally made by someone getting into polished concrete projects around the home. If you’re interested in pursuing this in the future, this is the perfect starter project.
You’ll need some concrete, plywood, 2x2s or 2x4s, scrap lumber, silicon concrete edge molding, dry erase whiteboard, sawhorses, and hairpin legs. You’ll also need some basic tools, bolts, and PVC.
Via Instructables
Upcycled Upright Piano Computer Desk
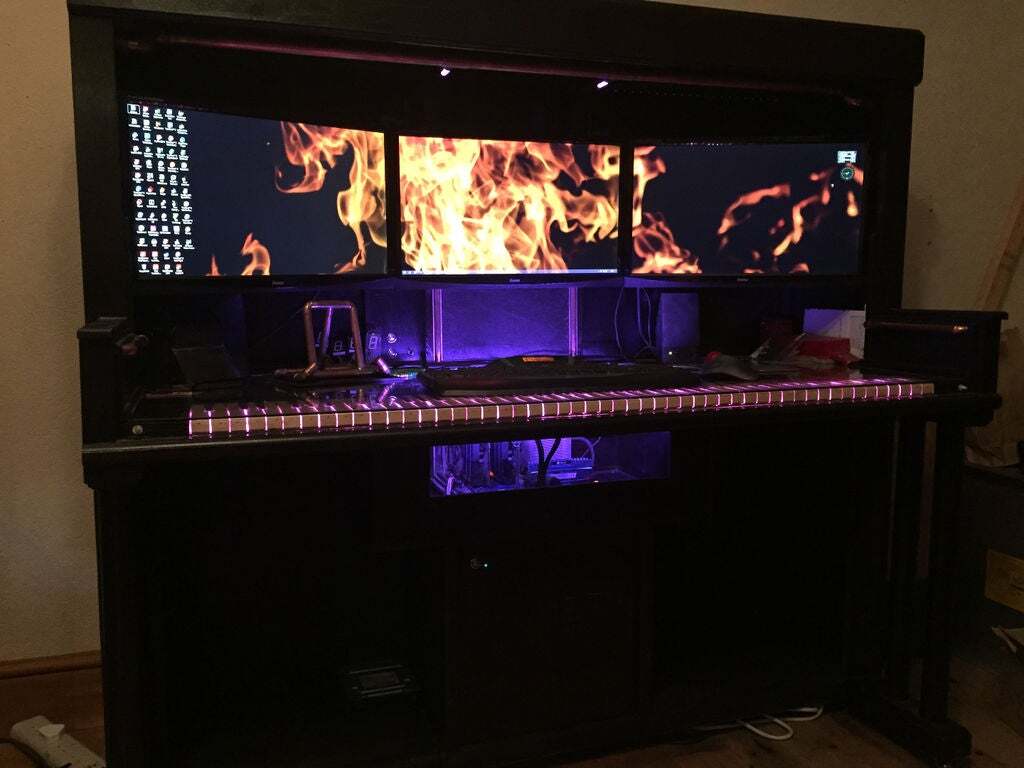
For anybody who loves music, quirky furniture, and hiding ugly tech equipment, you’ll love this upcycled old upright piano desk. It’s especially perfect for anyone who doesn’t have a separate office but needs to keep the computer set apart. And, of course, it’s super unique and interesting.
You’ll need an old upright piano to convert into this built-in computer setup. It will keep the computer cool, has space for three 23-inch monitors, and looks good anywhere in the house.
Via Instructables
Simple Plywood Computer Desk

This very simple, classically styled desk is a unique and easy-to-build choice for anyone who doesn’t have loads of experience woodworking or building. It’s a pretty small desk, making it easy to tuck anywhere, and offers some smaller, low-level shelves for minimal storage.
The desk is inexpensive to build – and could probably be built from scrap wood lying around if you do any kind of woodworking. Just watch the video and look through the tutorial for step-by-step.
Via Instructables
Desk With Built-in Computer and Laptop Stand
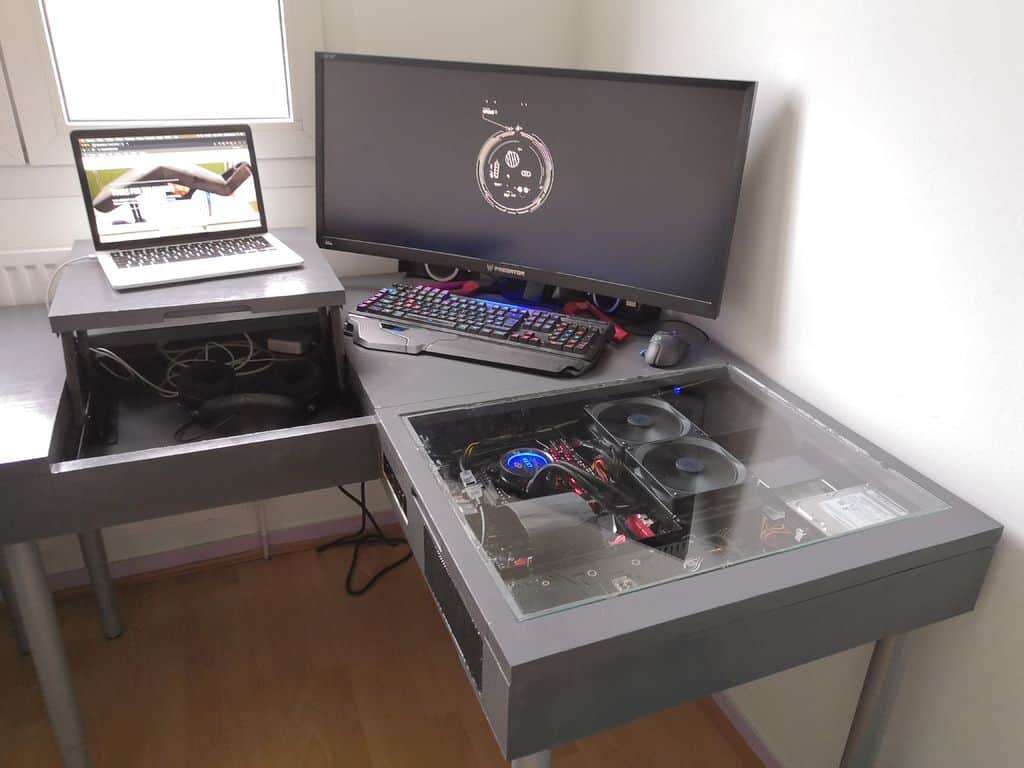
This is a uniquely elegant creative artist’s computer desk. Whether you’re a gamer streaming, a musician composing, a writer tracking projects, or anything else, if you need loads of space and different monitors and computers running, this is a great option.
You’ll build the computer into the desk – with easy access for repairs – with a cooling system, risers for your graphic card to keep it cool, fans, controls, and a control panel to keep it all running smoothly. You’ll upgrade old furniture, too, which makes it a great recycling project as well.
Via Instructables
Chic Rustic Wood Desk with Storage
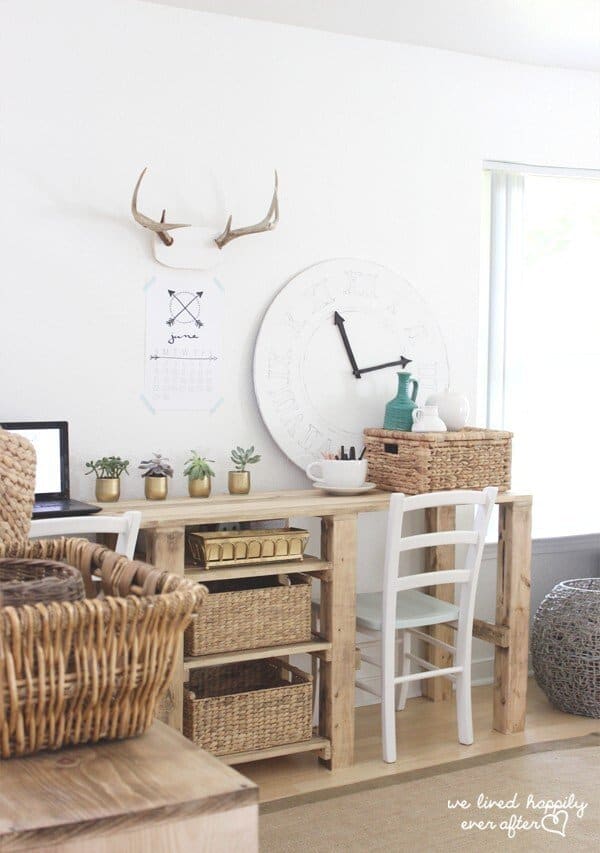
This is another great option for folks who need a dual-person computer desk at home. The design is chic and rustically beautiful. It makes for a great piece in almost any space, too – whether you’ve got laptops or desktops.
The plan includes straightforward illustrations for the less experienced woodworker and lots of details on how the design came about to make it easier for you to tweak it to fit your own needs. Plus, it’s super cheap to build at under $100.
Via We Lived Happily Ever After
Inexpensive Scrap Wood Lap Desk
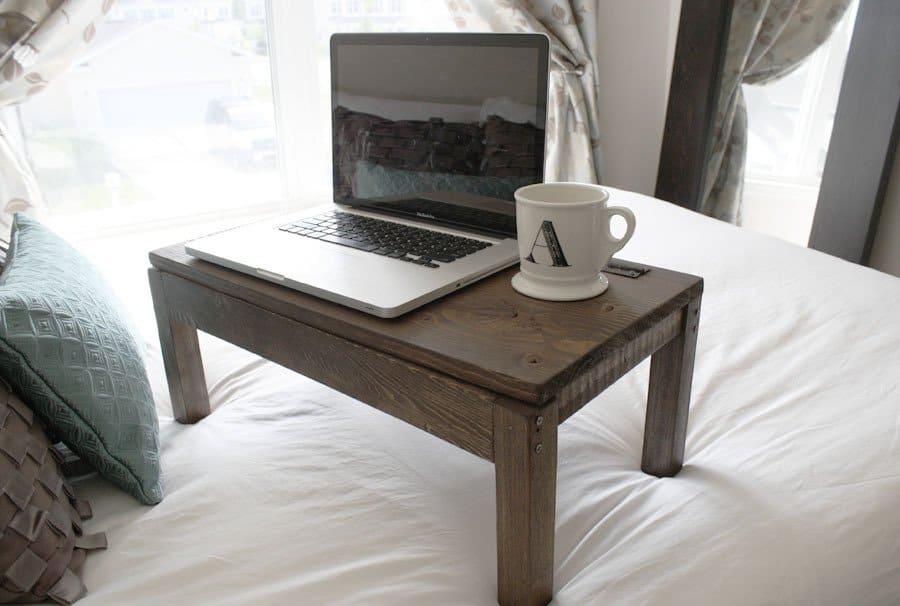
This is the perfect solution for people who need some variety in their workspaces at home. While the other desks are awesome and very useful, sometimes you just need a lap desk that has sturdy legs that you can use in bed or on the couch.
This lap desk is a modified version of the Ana-White plans, making it lighter and less cumbersome while still being perfectly functional and attractive. Take a look at both and see which one best suits your needs.
Via Jen Woodhouse
Pallet Farm-Style Desk
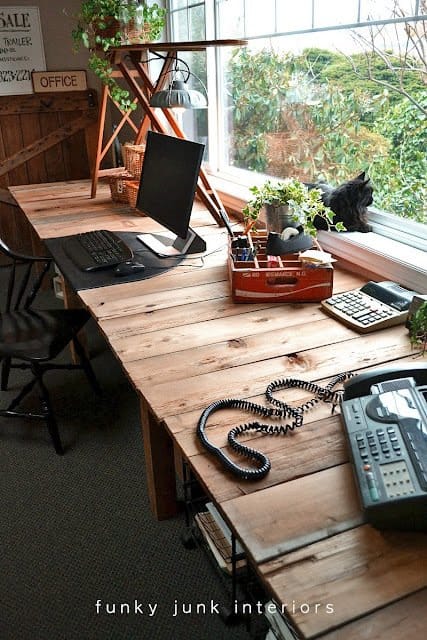
If you’re looking for a long, stylish desk, this pallet farm-style desk is a great option. It’s perfect for a large home office, providing loads and loads of surface space, area for storage, and plenty of legroom for any body type.
You’ll just need to grab some pallet posts, 2x4s, cedar planks, and some screws to create this beautiful monster. The original creator mostly reclaimed wood for everything, so if you can get your hands on it, you’ll have a super cheap, beautiful desk in a day or two.
Simple Glass Top Desk
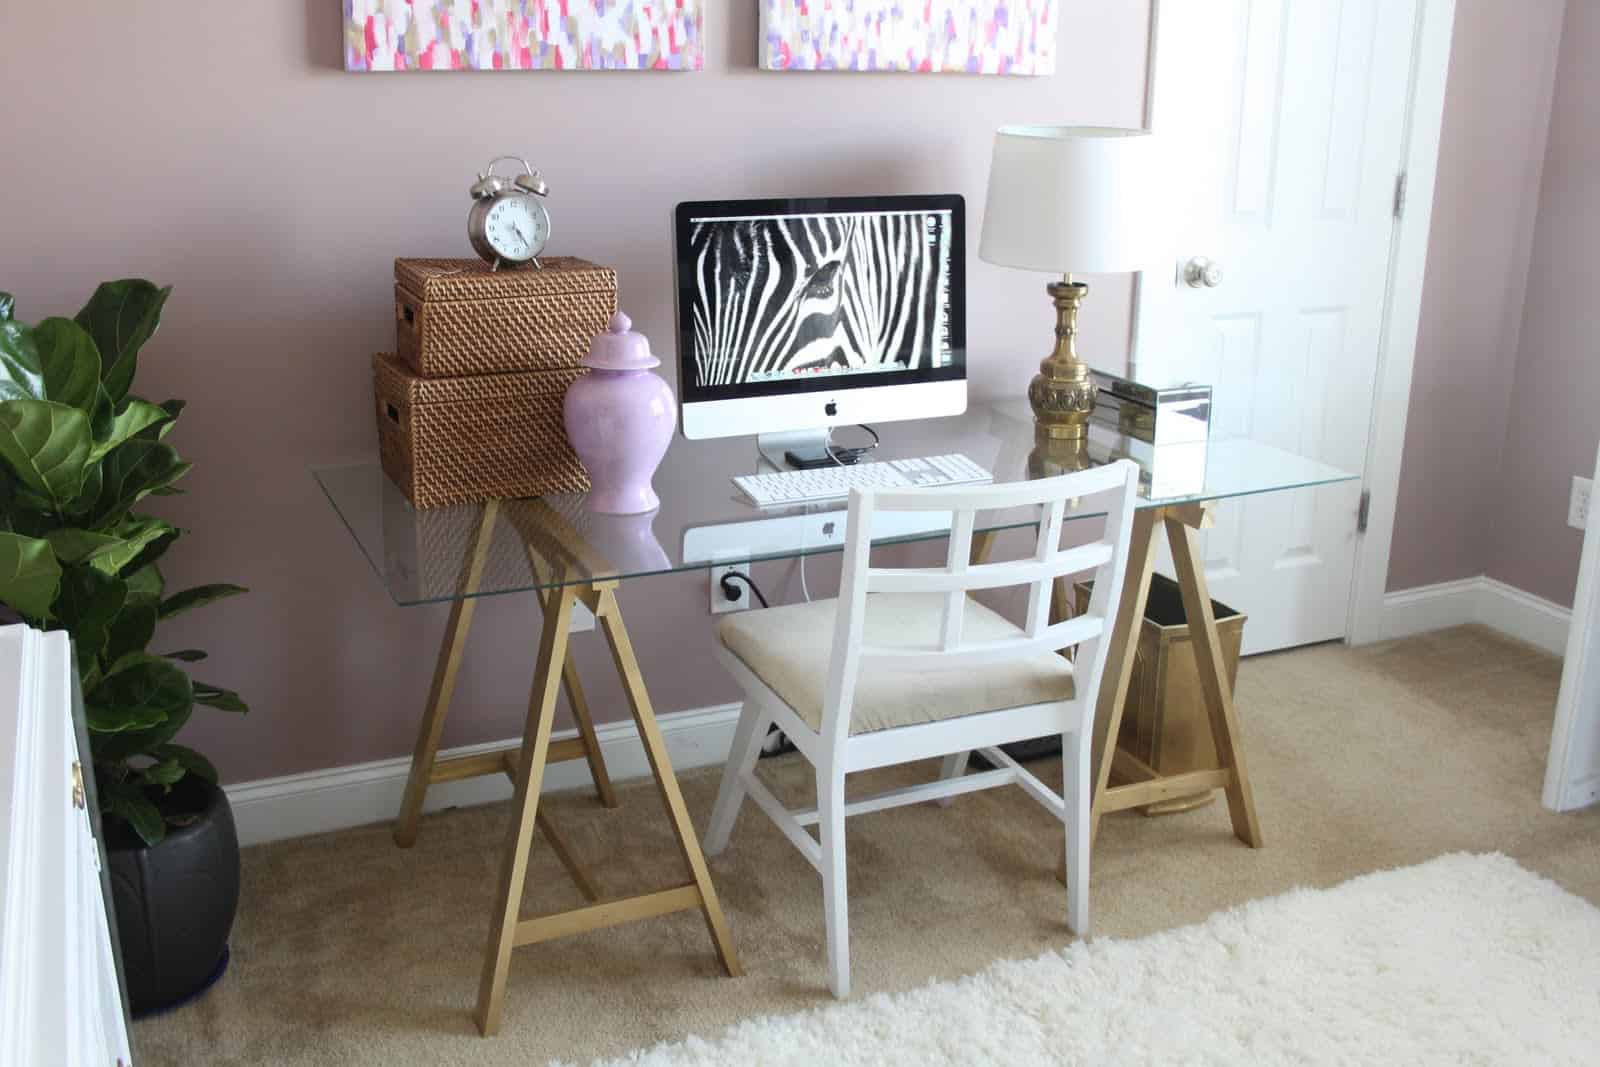
This incredibly fashionable glass top desk is an inexpensive option for anyone who’s looking for a light, airy feeling desk situation. It’s perfect for small rooms that need some extra light and fewer dark surfaces or for open areas that just need an extra boost in that “clean” feel from the glass.
The original posted just found two wood bases – costing $10 total – and reclaimed a piece of glass. You may not be able to do it quite as cheap, but it’s definitely worth exploring Craigslist’s free section near you, Freecycle, and, of course, the Facebook marketplace for bargains and freebies.
Ikea Upcycled Home Studio Desk
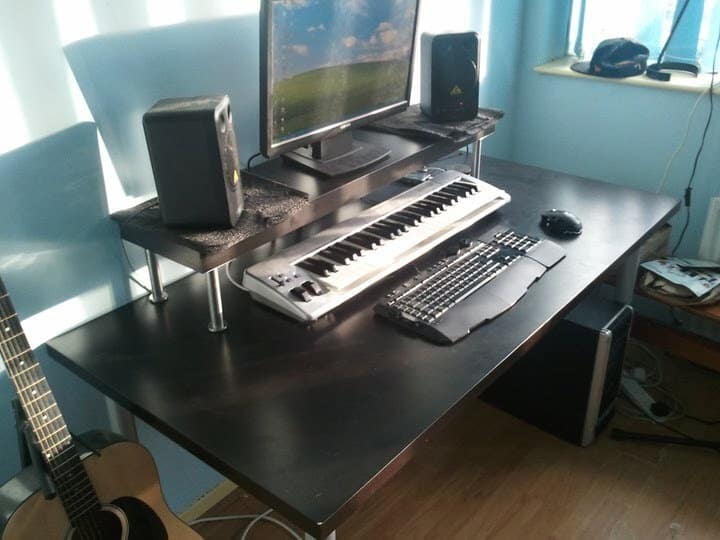
If you love upcycling Ikea finds as much as we do, you’ll love the idea behind this music studio desk that uses several old Ikea models for a whole new creation center in your home. It’s more of an idea, admittedly than a strict tutorial, but it offers a lot of food for thought.
And you may not be able to find the Vika Amon, Vika Curry, Capita, and Lack model products, but you can easily take your cue from the design and walk-through to create the perfect setup for your home studio.
Via Ikea Hackers
Dual Purpose Murphy-Style Desk and Chalkboard

We love dual-purpose projects around here. And this chalkboard and computer desk is no exception. Especially since it’s perfect for small spaces where Murphy-style furniture makes for easier storage and comfort.
The desktop is perfect for computer work, crafting, or practically anything you need. Plus then that chalkboard adds some fun to the mix, as well as practicality. You’ll need some pine board, L-brackets, eye-hooks, door hinges, a side bolt lock, chalkboard paint, some chain, and clear-coat.
Via Instructables
Wall Mounted Computer Desk
This design is for a simple, wall-mounted corner desk perfect for computer “centers.” If you’ve got several computer users, a common area in a place like an office, coffee shop, youth hostel, or other similar locations, you’ll definitely want to consider this.
It’s a budget-friendly, easy option that pretty much anyone can put together. You’ll just need some pine wood, shelf brackets, screws, sandpaper, a drill, power saw, and level to put this all together.
Via A Beautiful Mess
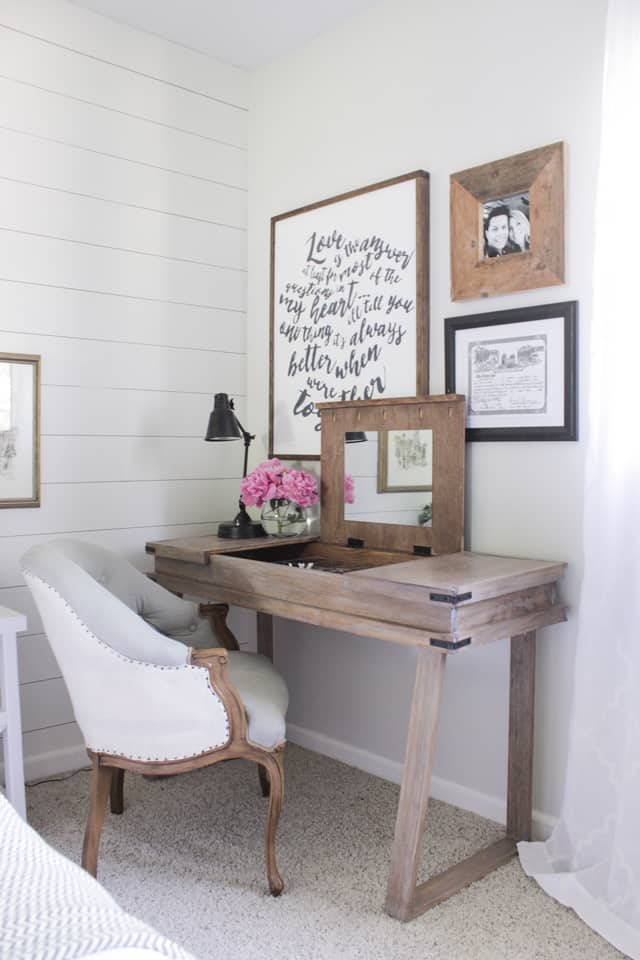
Three Compartment Computer Desk
This is a distinctly unique and beautiful computer desk option that provides you with simple storage. It’s absolutely gorgeous, too, depending on the type of wood you choose, and reasonably easy to build. You’ll need some basic supplies and to download the tutorial for easy construction.
For this, you’ll need some power tools, including a miter saw, table saw, Kreg pocket hole joinery system and a cordless drill. You’ll also need basic safety equipment along with the wood glue, wood filler, some wood, a square dowel, flat hinges, and mirrors.
Lean Pipe Computer Desk
This uniquely built computer desk puts together a few different elements to create an interesting, functional computer desk that you can customize for your own needs and use.
The Instructable lists links to check, but they’re no longer functioning. Instead, follow the tutorial on the site and look into alternative supplies. You’ll want to go through the step-by-step design and see how to measure and style exactly for your needs.
Via Instructables
Bookshelf to Standing Desk Upgrade
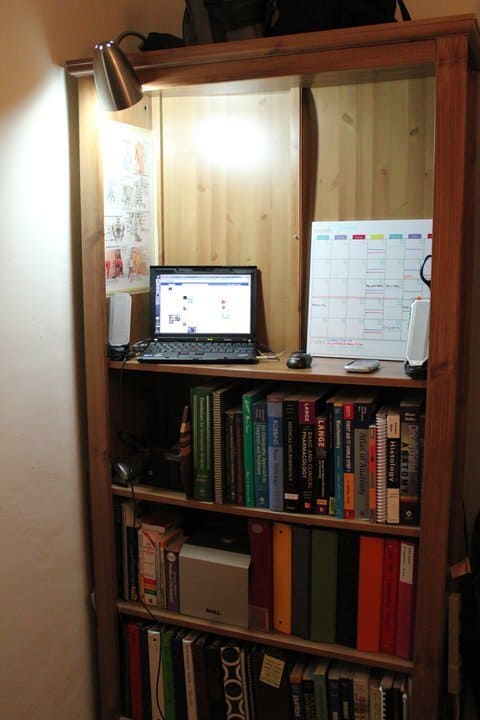
If you happen to have some bookshelves and need a standing desk, you are in luck. This great little tutorial gives ideas and steps on how to upgrade your sturdy bookshelf into a usable standing desk that keeps everything close at hand.
You’ll need a bookcase with removable shelves – they don’t need to be adjustable – and clear it off completely before you start. Decide which shelf is the right height for your workstation. Then prepare everything as recommended in the plans.
Via Off Beat Home
Classic Desk
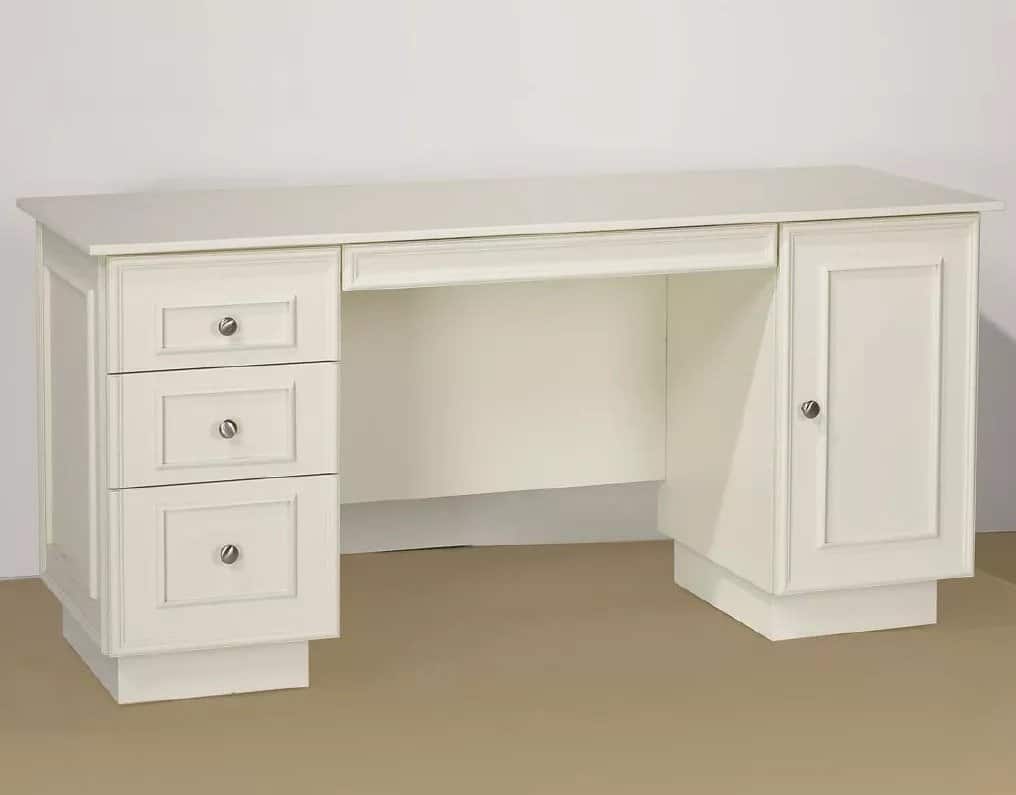
If you prefer the classic style desk and want to build your own, then you’ll love this design. It’s very well designed, functional, and beautiful. And it’s relatively easy to build for anyone with a little bit of woodworking experience.
You’ll need a table saw or a circular saw, a drill, and basic tools. For supplies, you’ll need MDF sheets, chair rail moldings, quarter rounds, screws, metal brackets, and some basic supplies and tools.
Via Rona
Your New Computer Desk is Waiting
Whatever your computer desk needs, you’re bound to find just the right option among those listed above. From standing desks to music studio desks, from treadmill desks to traditional-style desks, they’re these computer desk plans will pretty much cover you.
If you can’t decide which option to build or upgrade to, give yourself some time to sit with the designs. Take measurements of the space you’re planning to install the desk in.
Just be sure to read through the tutorial you pick a few times, gather all the supplies first before starting, and give yourself time to build, especially if you’re a beginner.